Although every React app is unique, they all start from the same place:
- You need an index.js, App.js, and App.css file
- You need to install
reactandreact-dom - You need a toolchain to use JSX
- You need a bundler to bundle all your .js, .css, etc. files into one easy-to-deploy file
This foundation is essential!
… But it’s also monotonous to set up for every project.
I’m sure you’d rather spend time on the features unique to your app and Vite can help!
Vite (pronounced “veet” and French for “quick” 👀) makes you more productive.
With one command and a few seconds, it can generate all the above boilerplate for you and more!
Additionally, Vite:
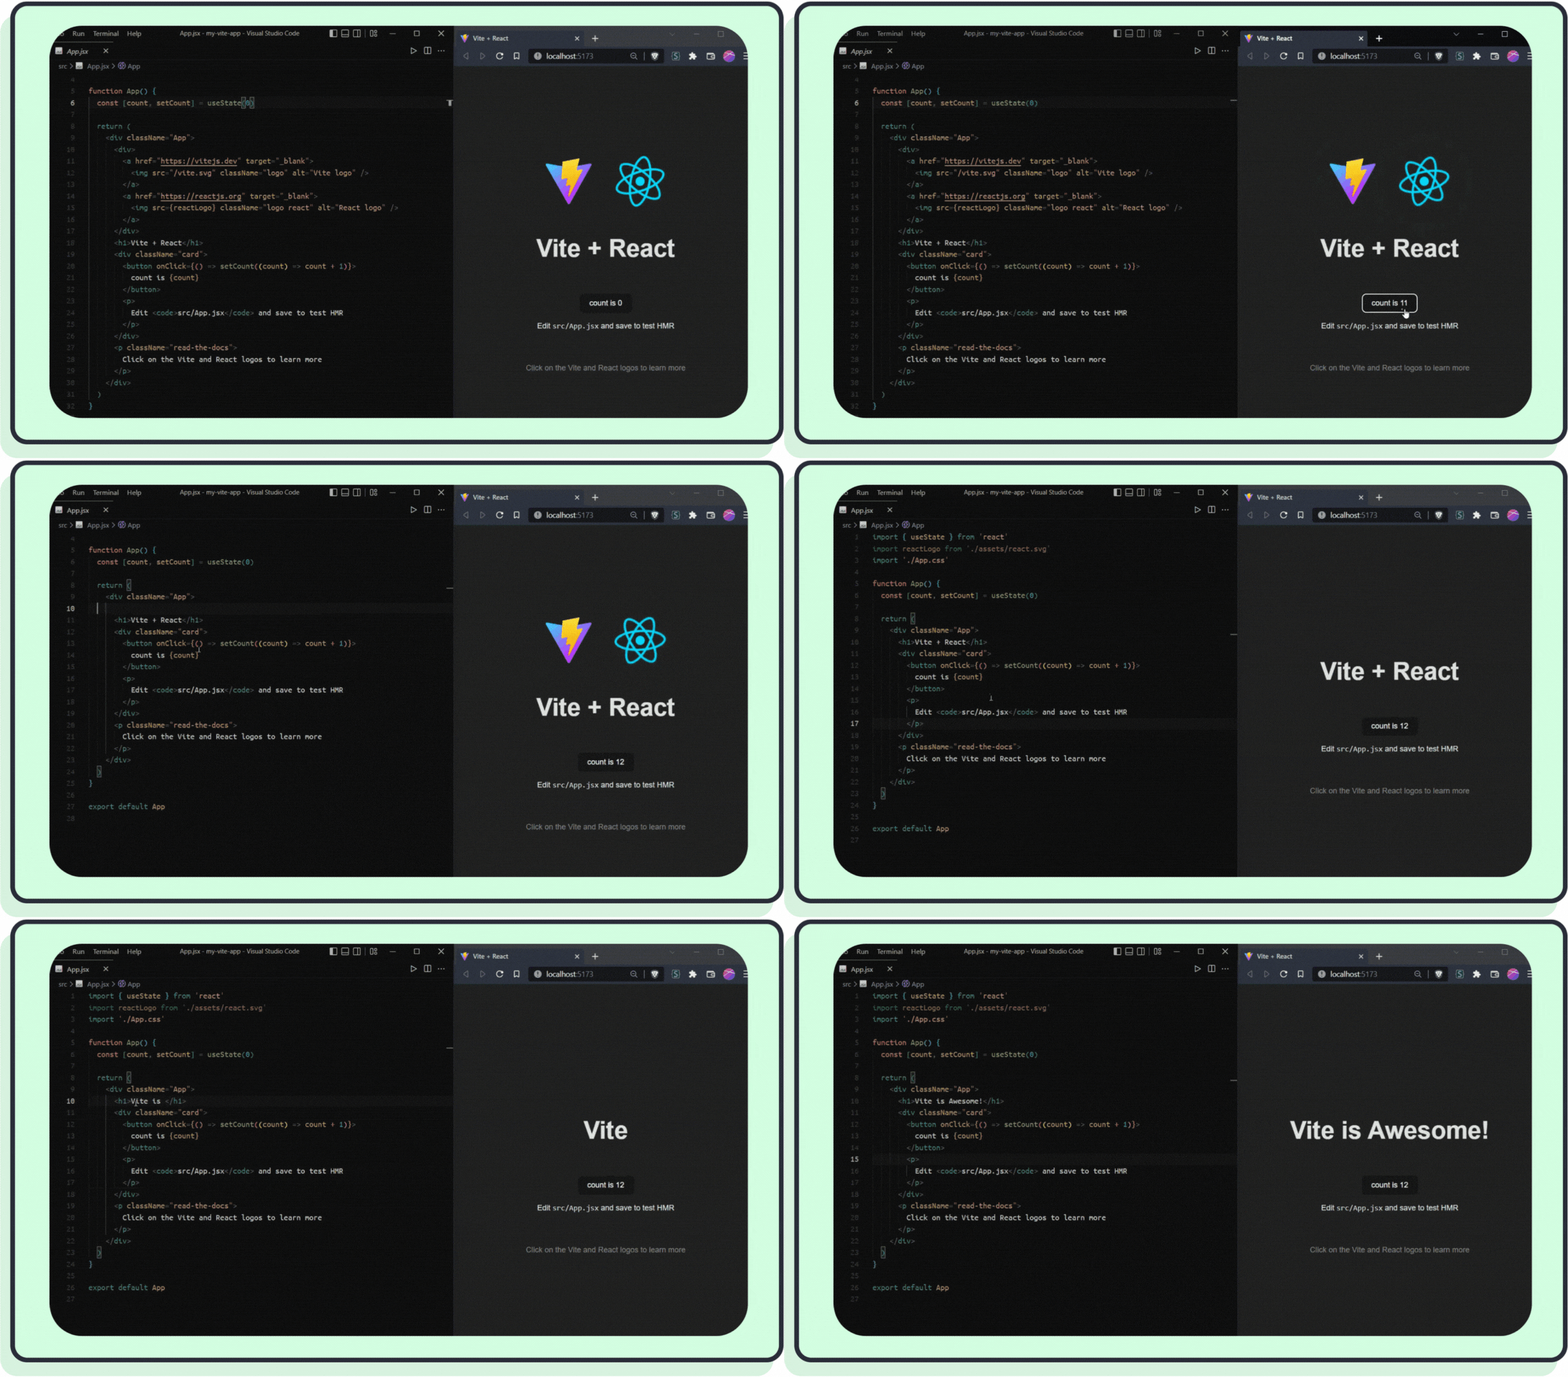
- Enables Hot Module Replacement (HMR), as seen in the animation below
- Makes it easy to deploy your website to the internet
- Helps you import and manage (potentially sensitive) environment variables
- Makes it easy to bolt-on technologies you need, for example, TypeScript
Needless to say this is something you need in your arsenal of developer tutorials!
In this tutorial, I will show you step by step:
- How to scaffold your React app with Vite
- How to enable HMR, as seen above
- You will learn how to deploy your app easily to Netlify
To wrap up this ✨ ultimate ✨ post, I’ll give a whistle-stop tour of some advanced Vite features.
What is the difference between Vite and Create React App?
If you've been around the React ecosystem for a minute, you will likely recognize Create React App (CRA), which, on the surface, sounds very similar to Vite.
Since CRA is made and maintained by React themselves, it's natural to wonder how these two tools compare.
CRA
Around seven years ago, React designed and released CRA to help newer developers adopt React more easily.
In particular, React acknowledged that to use JSX, you need some toolchain, and that made React's learning curve much steeper compared to, for example, Vue, where you don't need a build tool.
More experienced React developers use and appreciate CRA as well. Although, they sometimes need to use something else once their projects become more complex.
Vite
The web has fundamentally evolved in the 7 years since CRA was designed.
According to the Vite documentation, "as we build more and more ambitious applications, the amount of JavaScript we are dealing with is also increasing dramatically. It is not uncommon for large-scale projects to contain thousands of modules."
Because the dependencies to make a React app have become so large and interconnected, tools like CRA can sometimes take an unreasonably long wait (sometimes up to minutes!) to start up, and changes can take a couple of seconds to be reflected in the browser.
Vite points out, "The slow feedback loop can greatly affect developers' productivity and happiness."
In summary, React apps are becoming more complex, demanding more from our tools. Simultaneously, web browsers are evolving. For example, the latest browsers now support importing modules directly.
We can only benefit from these advancements if our tools are updated.
That is where Vite comes in.
Vite aims to leverage advancements in the ecosystem. Not only to make load times quicker but also to offer an instantaneous, almost magic-feeling developer experience as you saw in the HMR video above.
Unlike Create React App, Vite is not inherently coupled with React. You could use Vite with Vue, for example!
While you might not plan to use another frontend library any time soon, open source maintainers banding together across the ecosystem will benefit you as more features make their way to releases and bugs are squashed more quickly.
Getting Started With Vite
Alright, now you know all about Vite (and how it compares to CRA), let's get hands-on.
In this section, I encourage you to follow along as we install Vite and set up a React project in no time.
What do I need to know? To follow along, you will need to have npm installed. It would be good if you were already familiar with npm and command-line programs, but it's not a requirement!
How to run Vite
The official way to run Vite is using the npm create command. Open your terminal of choice, copy, then run the following command:
npm create vite@latest
Vite makes life easy by prompting you with questions.
First, Vite asks for your project name.
Then, Vite will want to know if you’re using React or another library (remember, Vite is not limited to React.)
Here, I called my project vite-app and chose react:
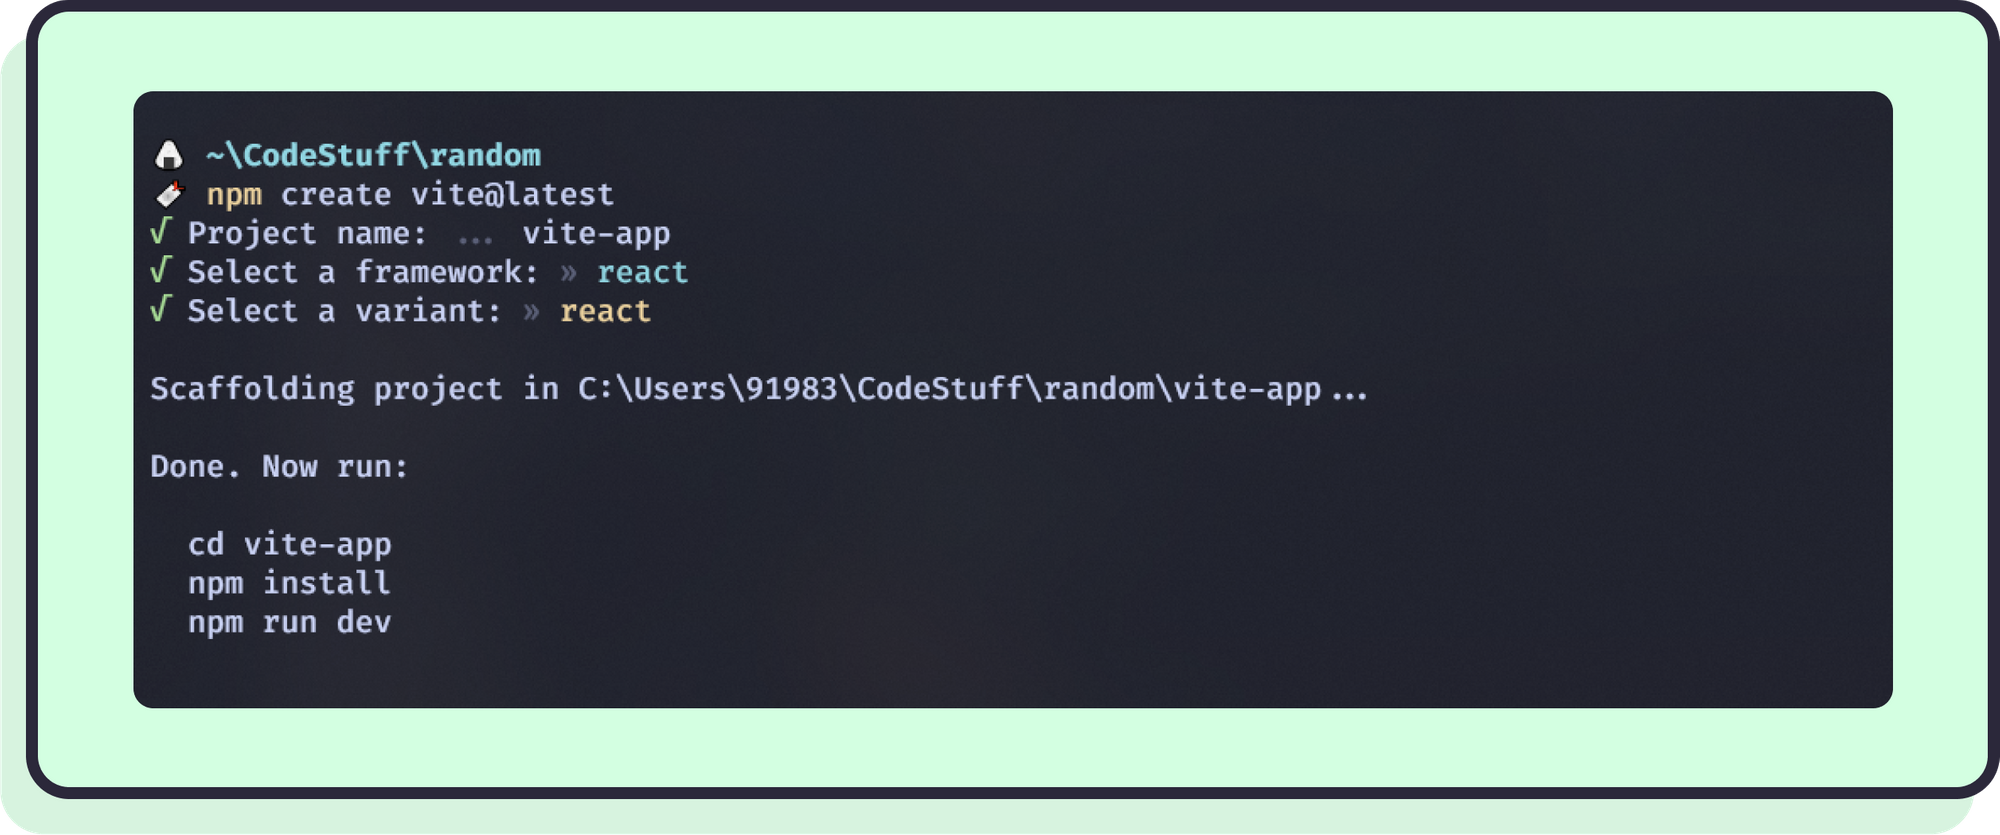
True to its name, Vite will quickly generate all the scaffolding for your project and some handy scripts to enable HMR.
Once the command has finished running, cd into your folder and run the following commands:
cd vite-app # Vite made a new folder named after your project
npm install
npm run dev
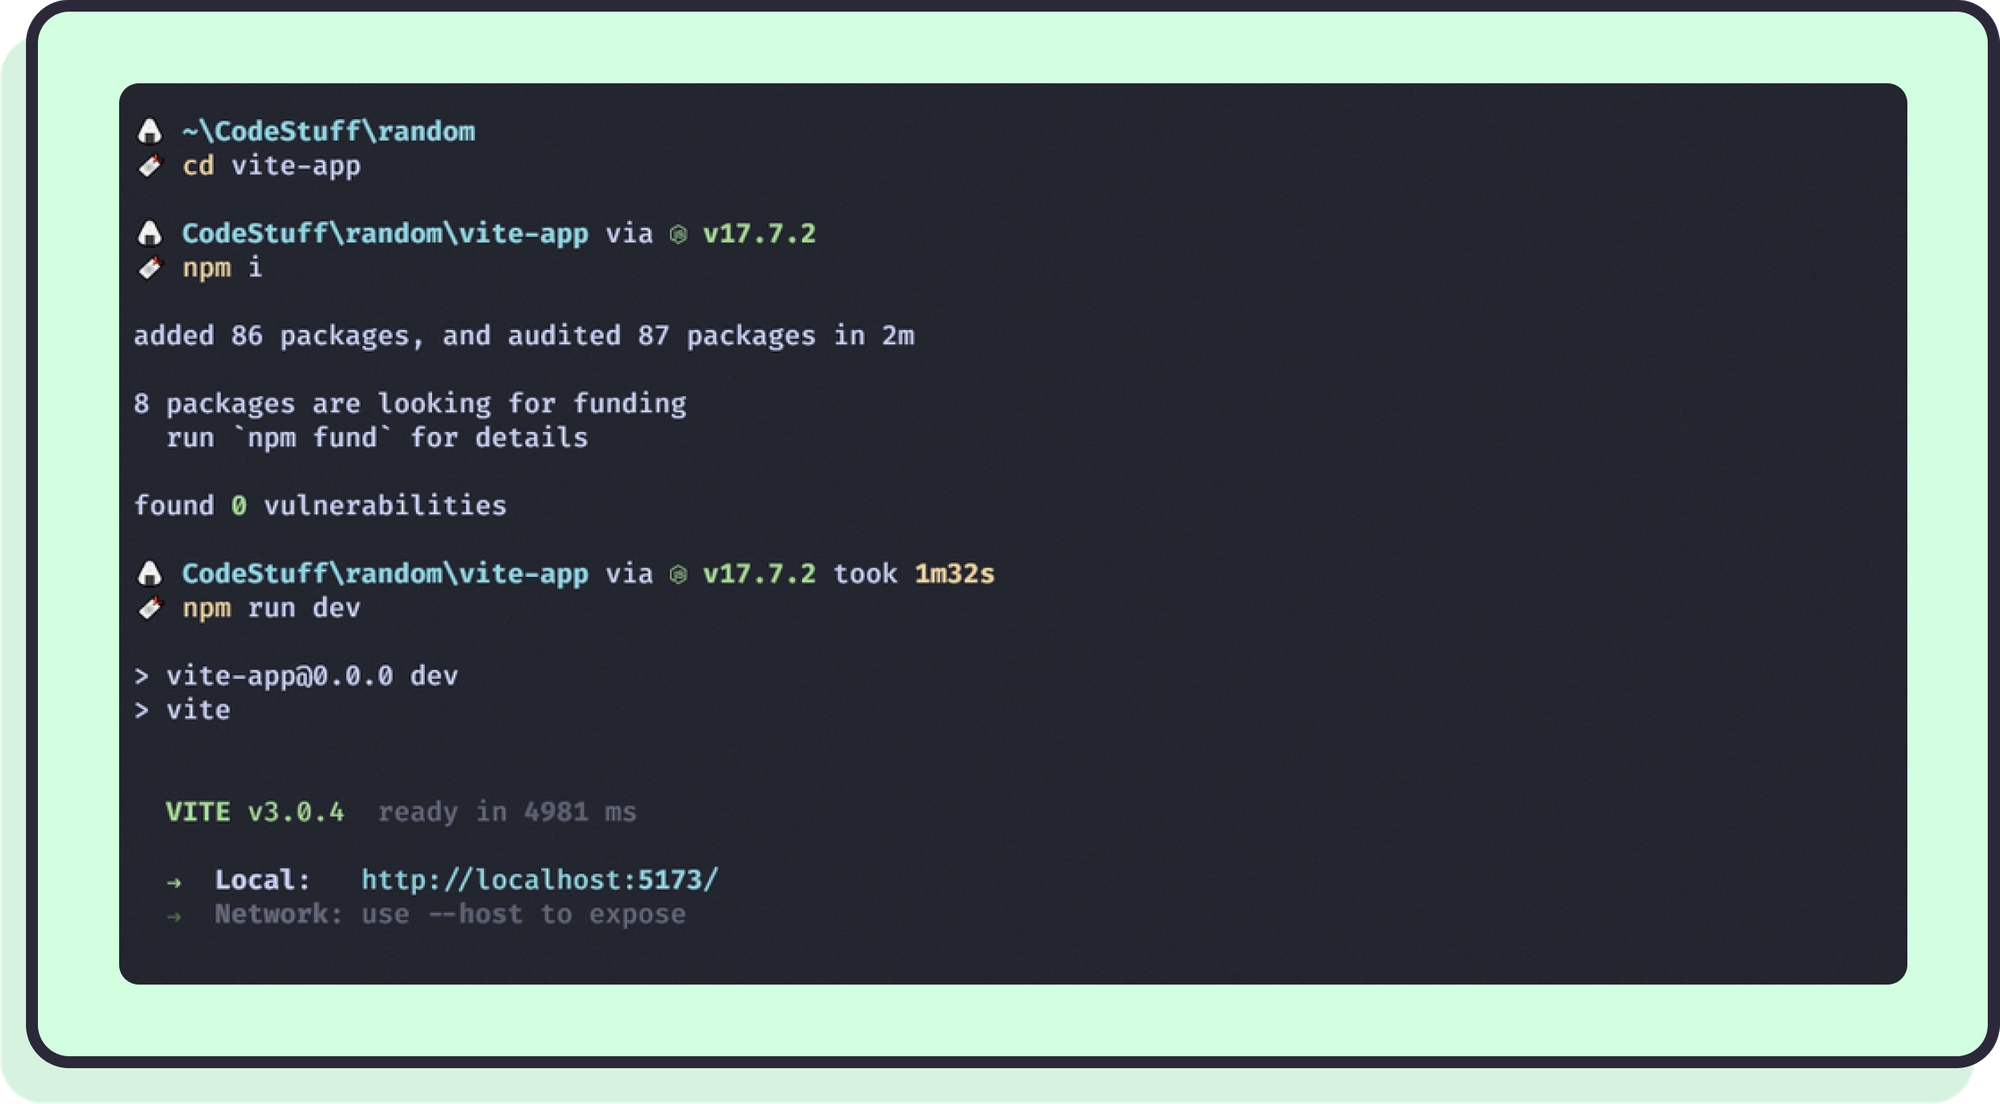
Since both npm create and npm install depend on your internet connection, they may take a minute or two to run.
Once everything is set up, look how quickly Vite served the app - just 5 seconds! That’s the magic of Vite.
Next, open localhost:5173 in your browser. You will see Vite's default template:
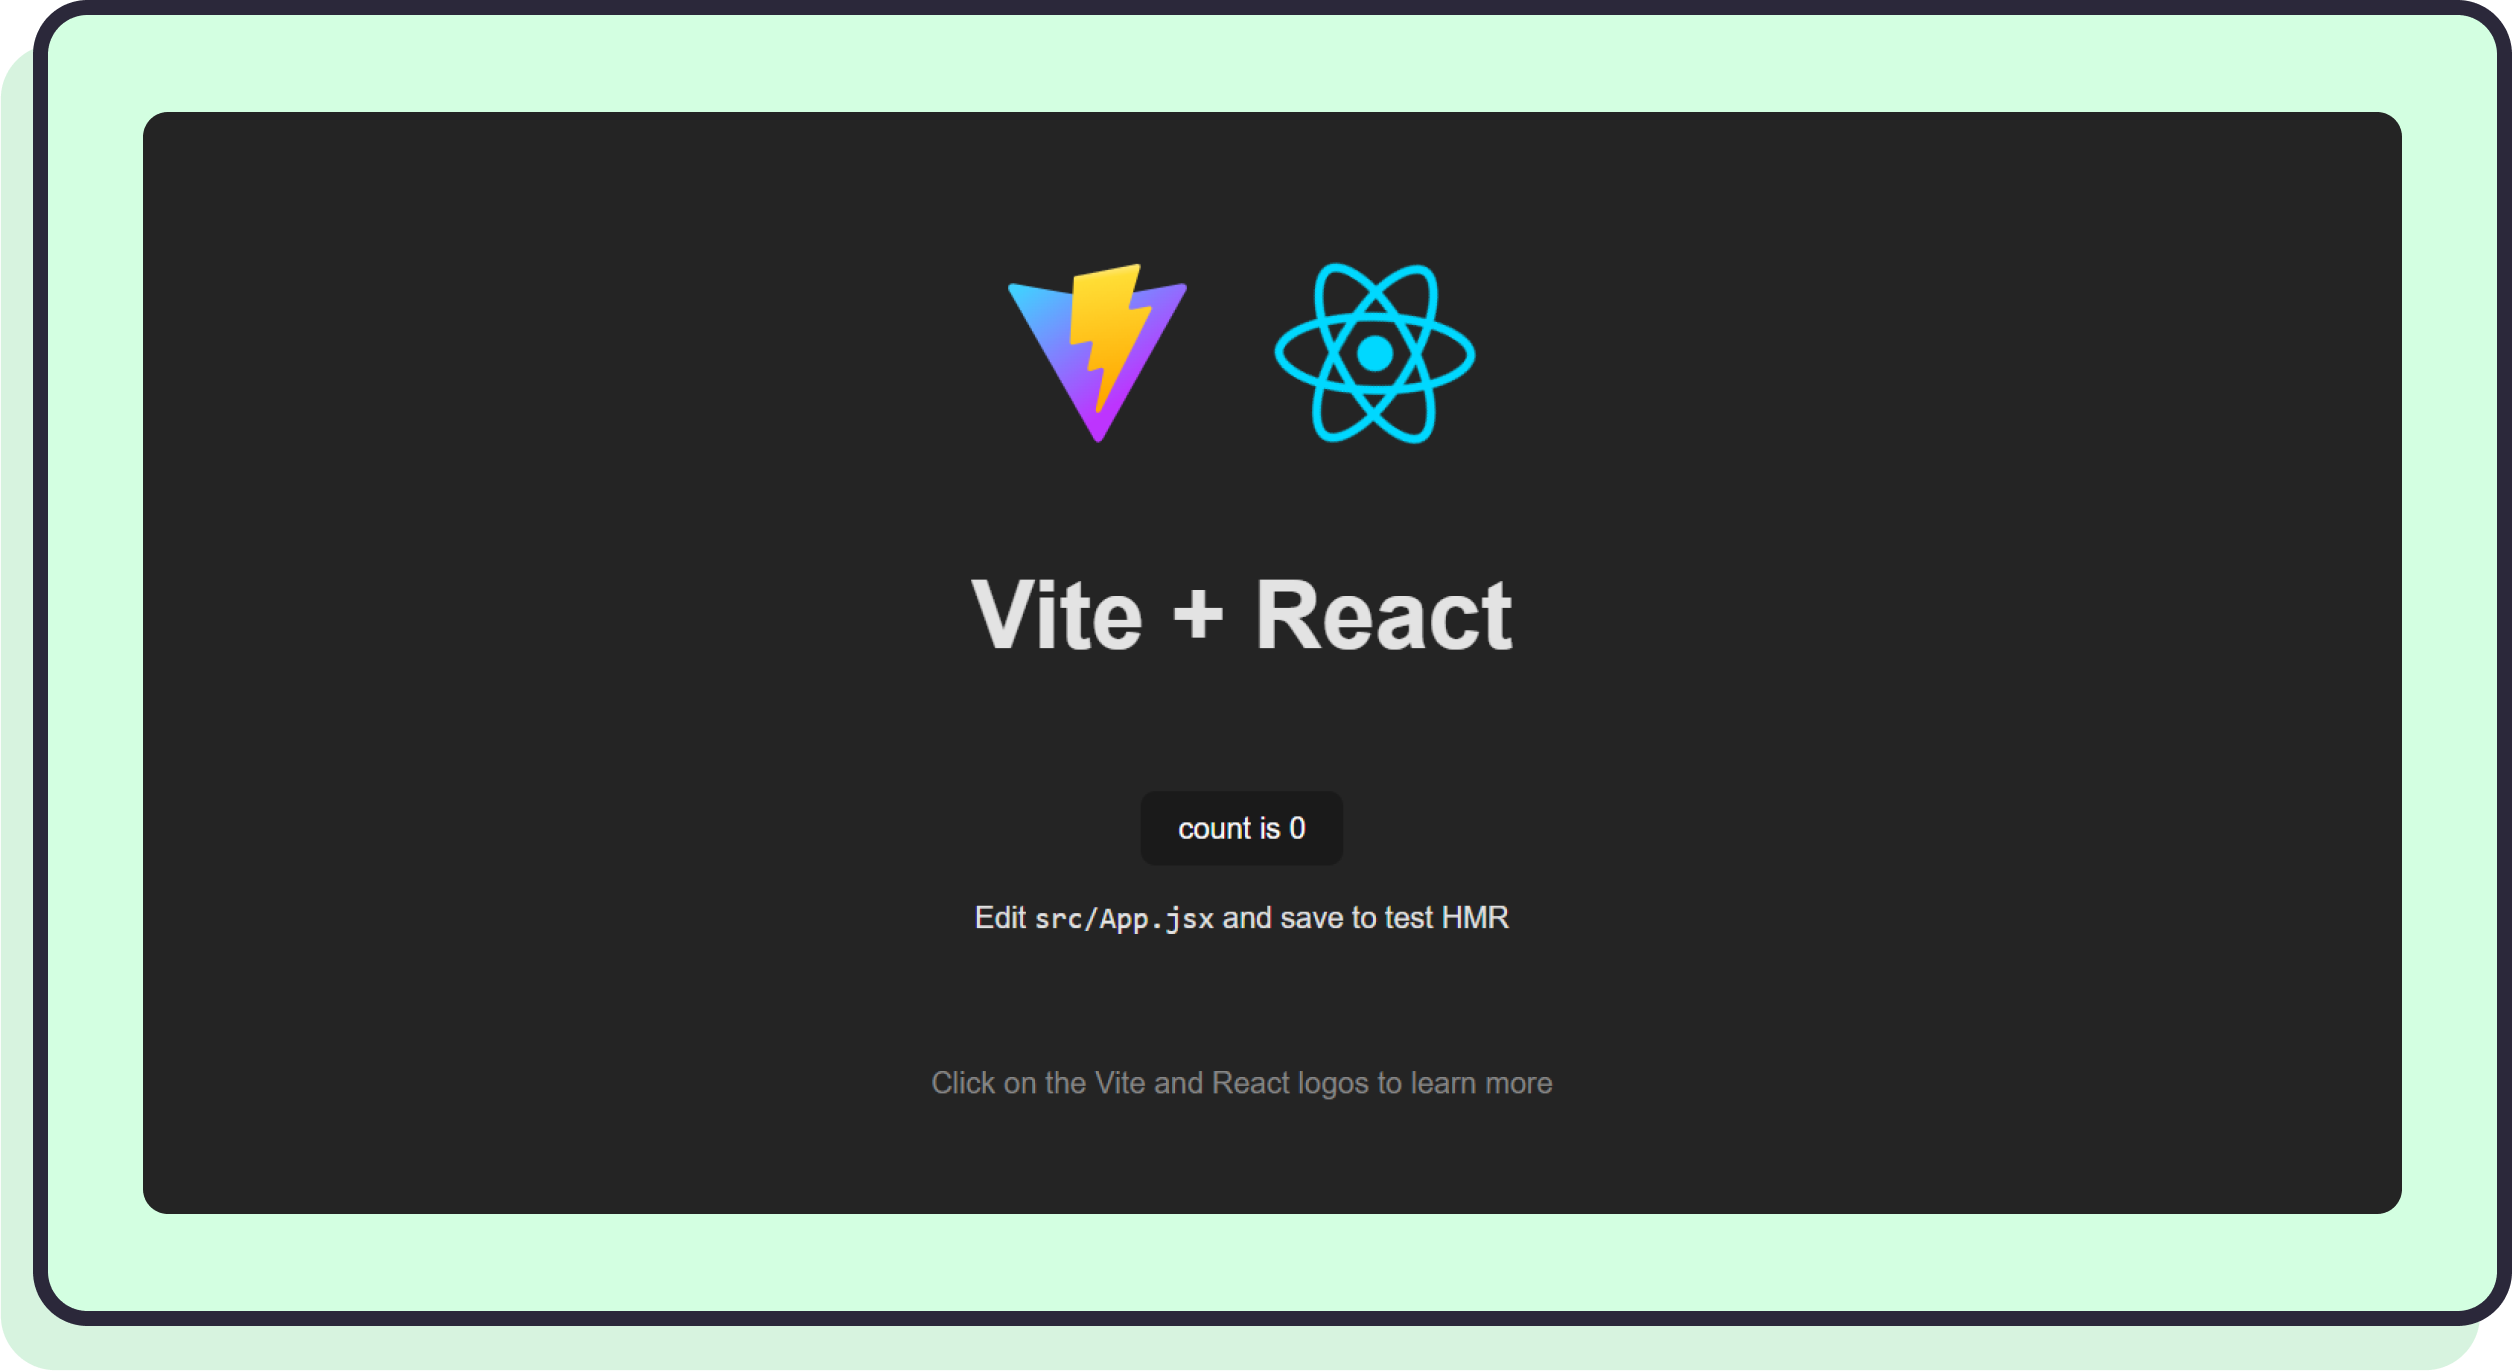
Of course you want to make some updates. Why not take advantage of HMR in the process?
What is HMR?
In the past, whenever you would make a change to your code - no matter how small - you would need to rebuild the entire app and refresh the page.
Rebuilding the entire app for one small change is slow.
Refreshing the browser isn't so bad, but you lose all the values in your variables (otherwise known as state) every time you do that.
Sometimes this is desirable, but it would be better if only the presentation parts changed when it comes to tweaking or iterating on your app (especially the style).
Enter HMR!
HMR intelligently rebuilds and reloads only the parts of your app that actually changed. It’s fast, and you keep your application state if you want.
HMR saves time you would otherwise spend waiting around or inputting data to recreate your application state. More than that, it reduces friction, allowing you to stay focused on your task and be more productive,.
Test Vite HMR
Let’s take Vite’s built-in HMR for a spin.
- Open
src/App.jsin your editor - Open localhost:5173 (ideally on the other side of your screen to observe the effect)
- Increment the counter
- Remove lines 10-17 from
src/App.js(basically removing the two logos from the app).
If you opened your windows side by side, you should observe the following:
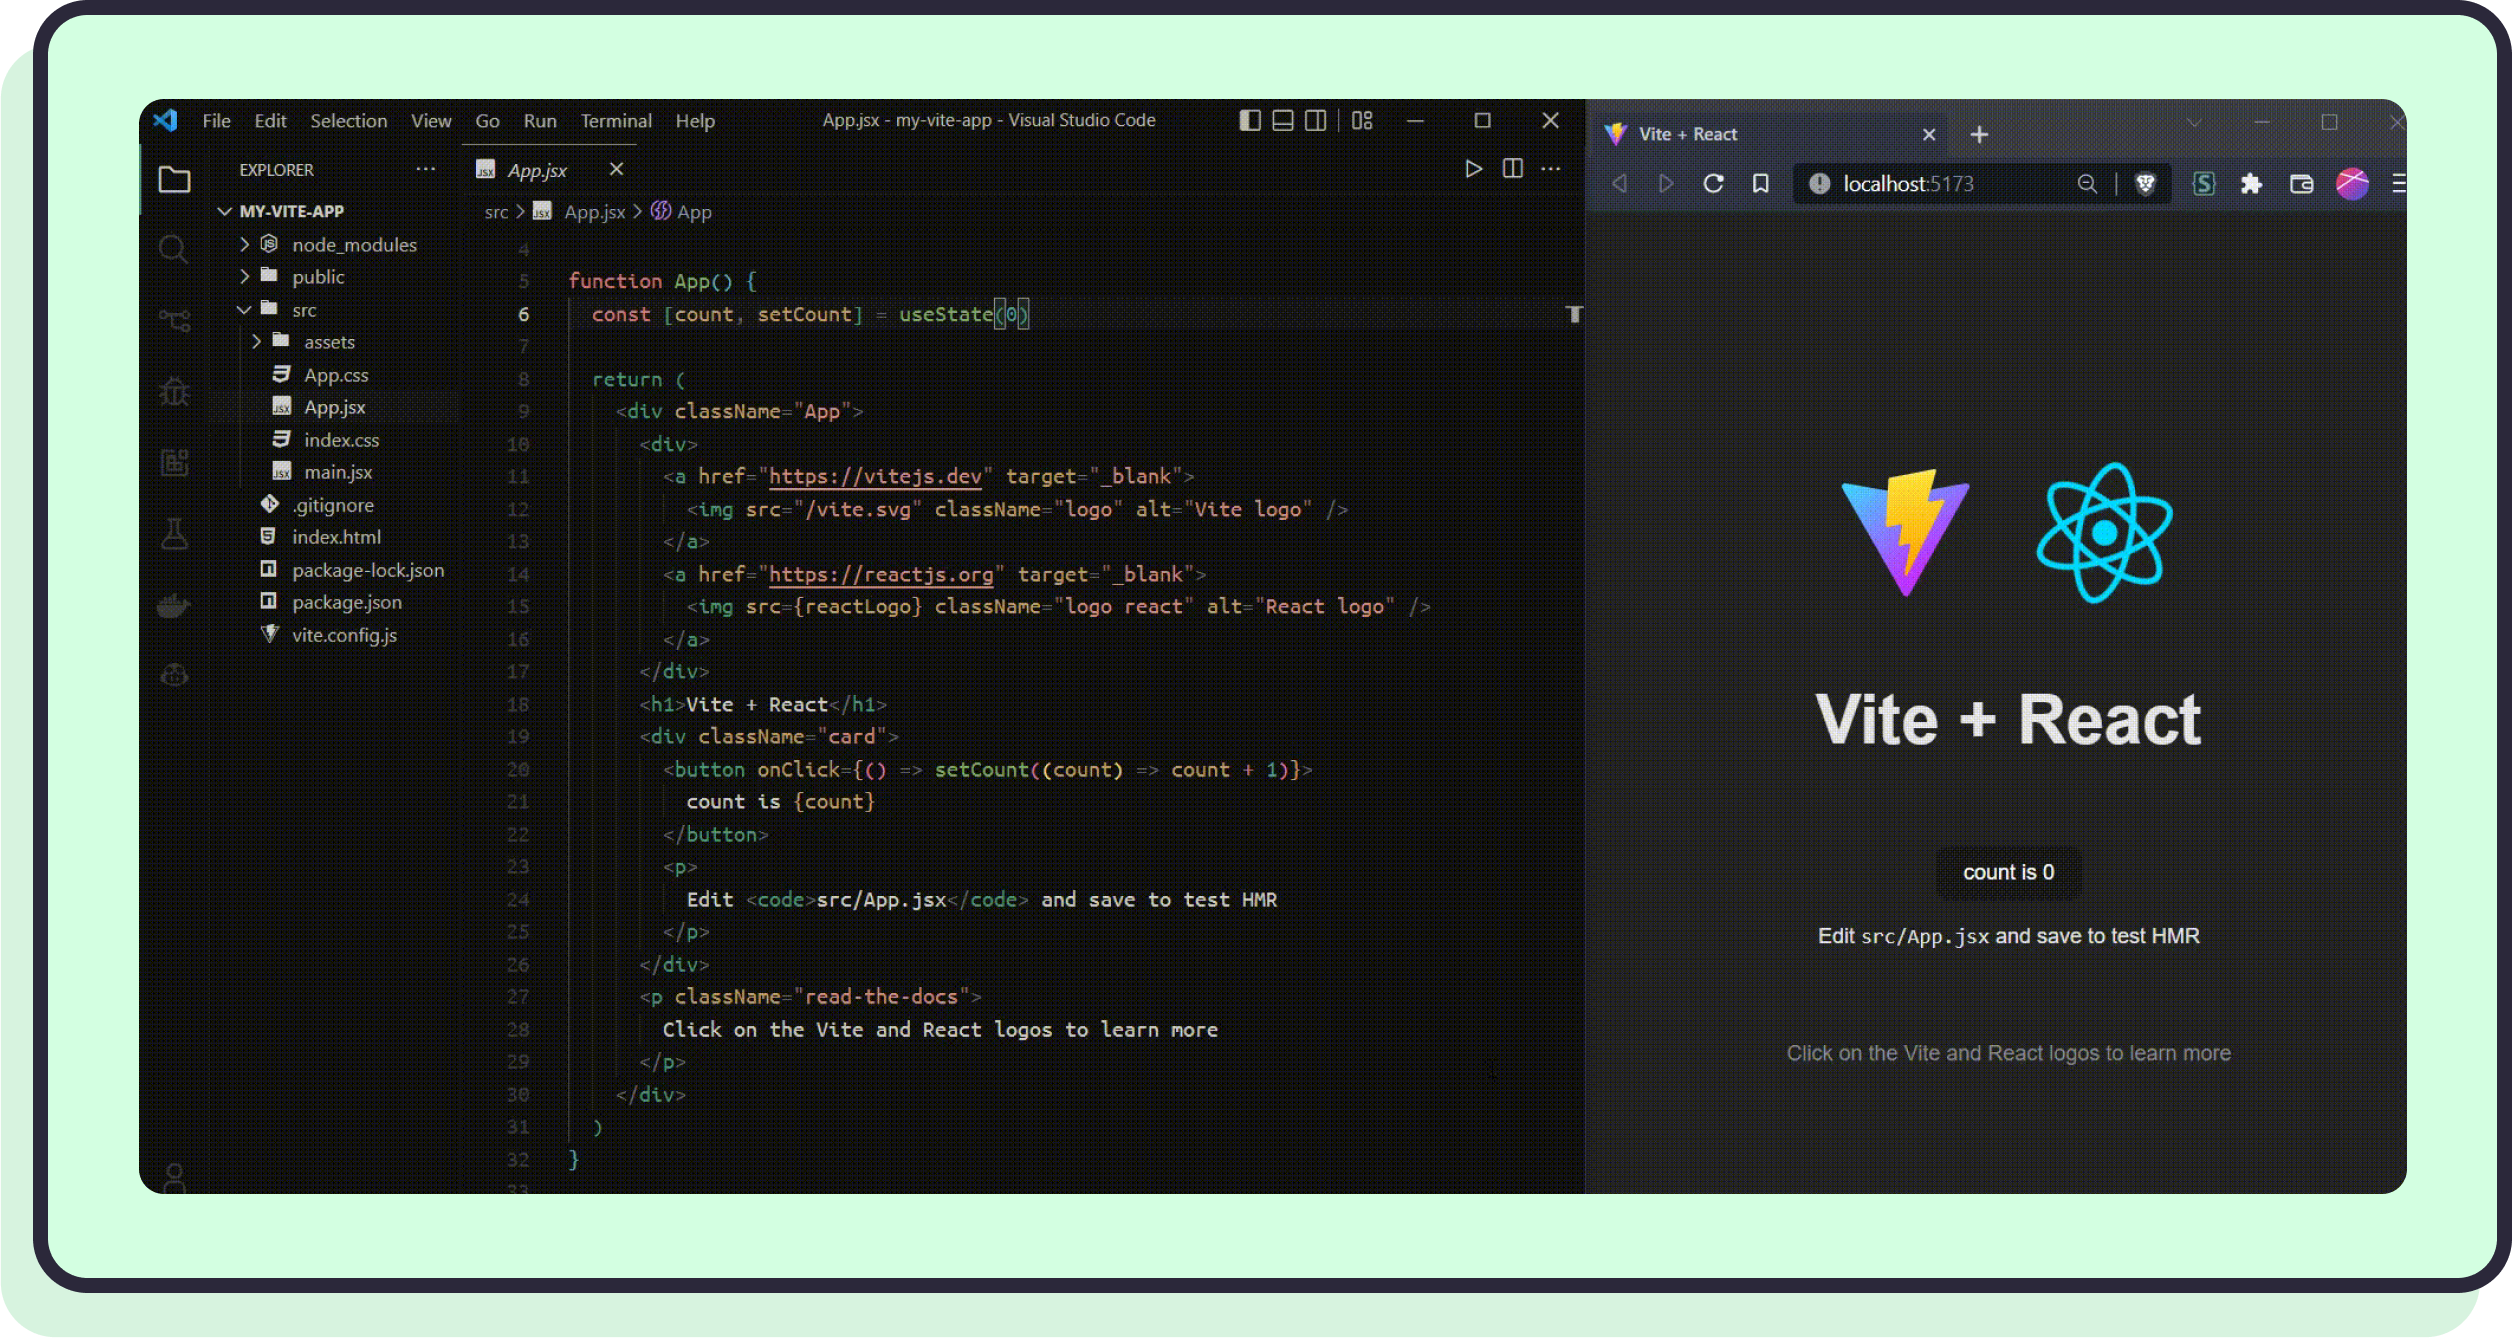
In my case, I increment the coutner to 12 before removing the logos.
Usually, the page would reload, and the counter would be reduced to its default value of 0. HMR worked its magic behind the scenes to only change the part of the page that actually changed in the code.
Deploying your app to production
Vite makes it approachable to deploy your React website to Vercel, GitHub pages, or Netlify.
So approachable, I am encouraging you to follow along as we deploy the generated application to Netlify. When you make changes, updating the live website will be much easier then.
What do I need to know? To follow along, you will need: A GitHub account, Git installed locally, and fundamental knowledge of Git.
Start with Git
Nowadays, a practice called continuous deployment is common and encouraged.
In simple terms, when you push your code to the main branch on GitHub, services like Netlify detect this, download your updates, and update your live website. Vite can help accommodate this.
That might sound a bit mind-bending so I encourage you to try it for yourself. It’ll be much easier to understand when you see it all in action.
First up, create a GitHub repository and note the URL.
Next, run the following commands (making sure to replace <your_github_repository_url_goes_here> with your repository URL!):
git init
git add .
git commit -m "Initial commit"
git branch -M main
git remote add origin <your_github_repository_url_goes_here>
git push -u origin main
Import project in Netlify
Great! You’ve made a GitHub repository and uploaded the code Vite generated there.
Next, we’ll let Netlify know about the GItHub repository.
If you haven’t already, this is a good time to make a free Netlify account.
Once you’ve logged in, click Add New Site, then Import Existing Project.
You will see the following page:
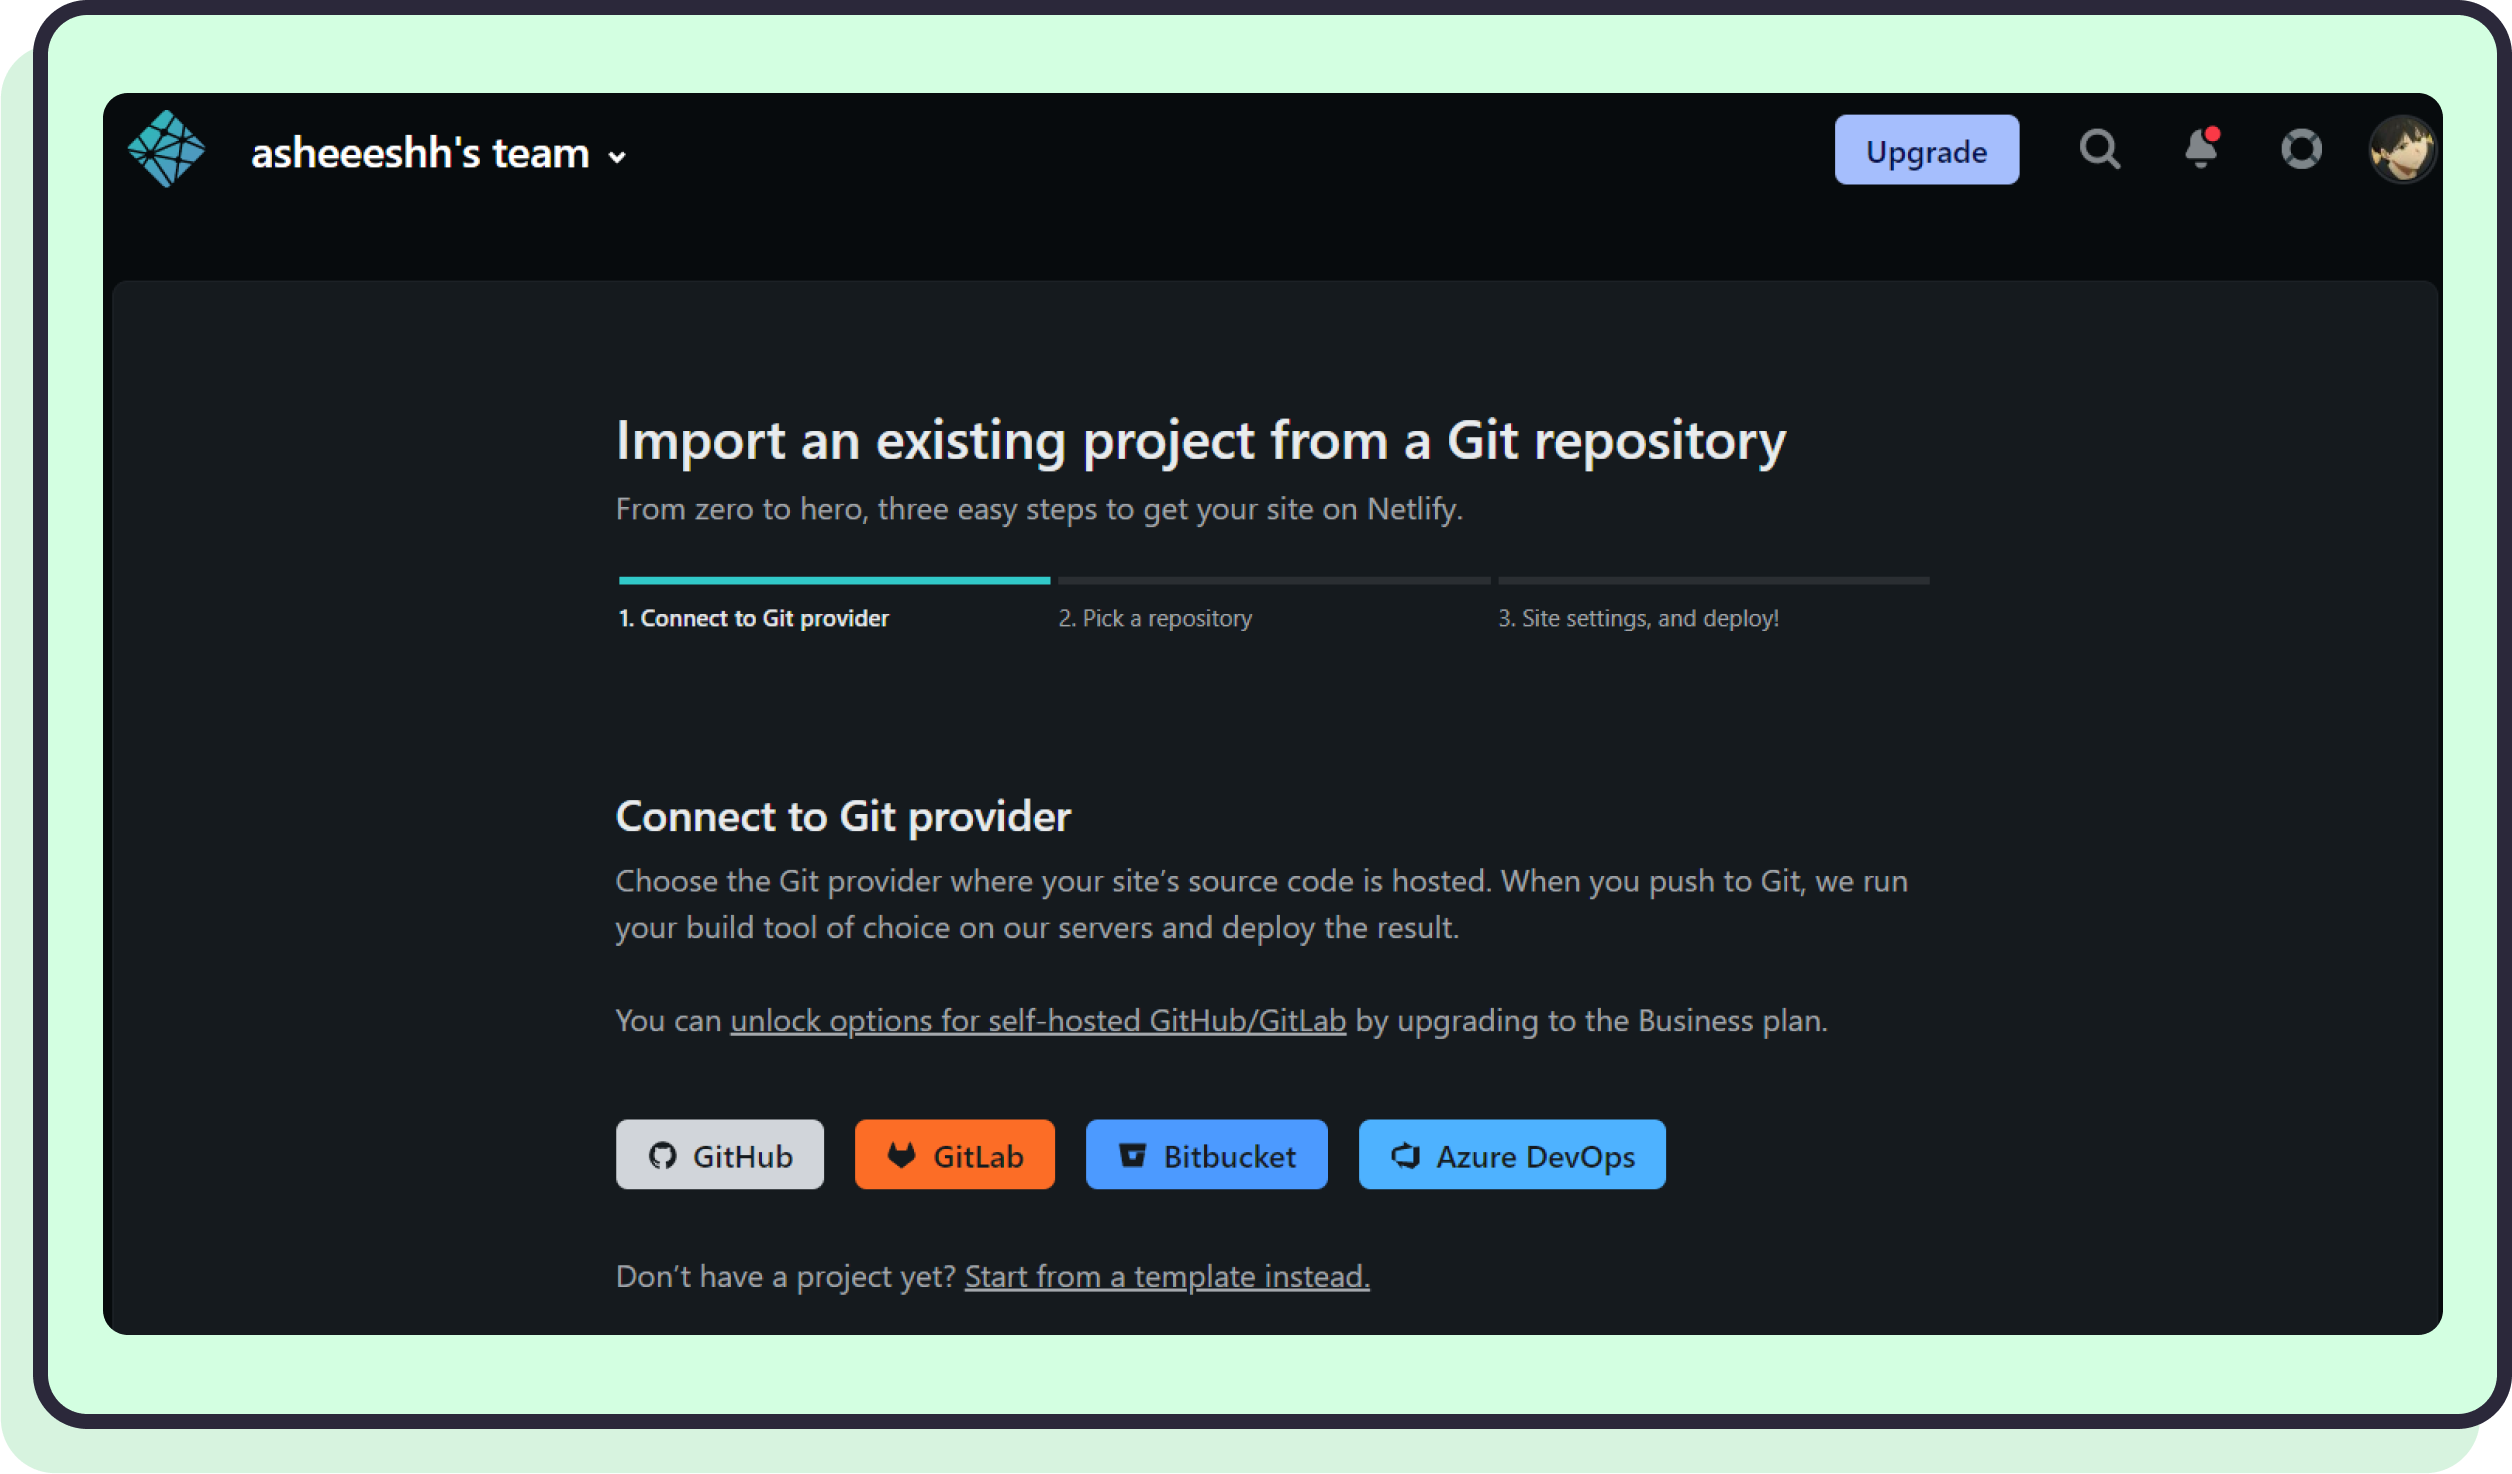
Click GitHub.
GitHub will ask if you want to give Netlify permissions to see your repositories and download them. You can go ahead!
Once Netlify has permission to interact with your GitHub account, it will load and list all your repositories. Pick the repository you just created. As you may recall, mine is called vite-app:
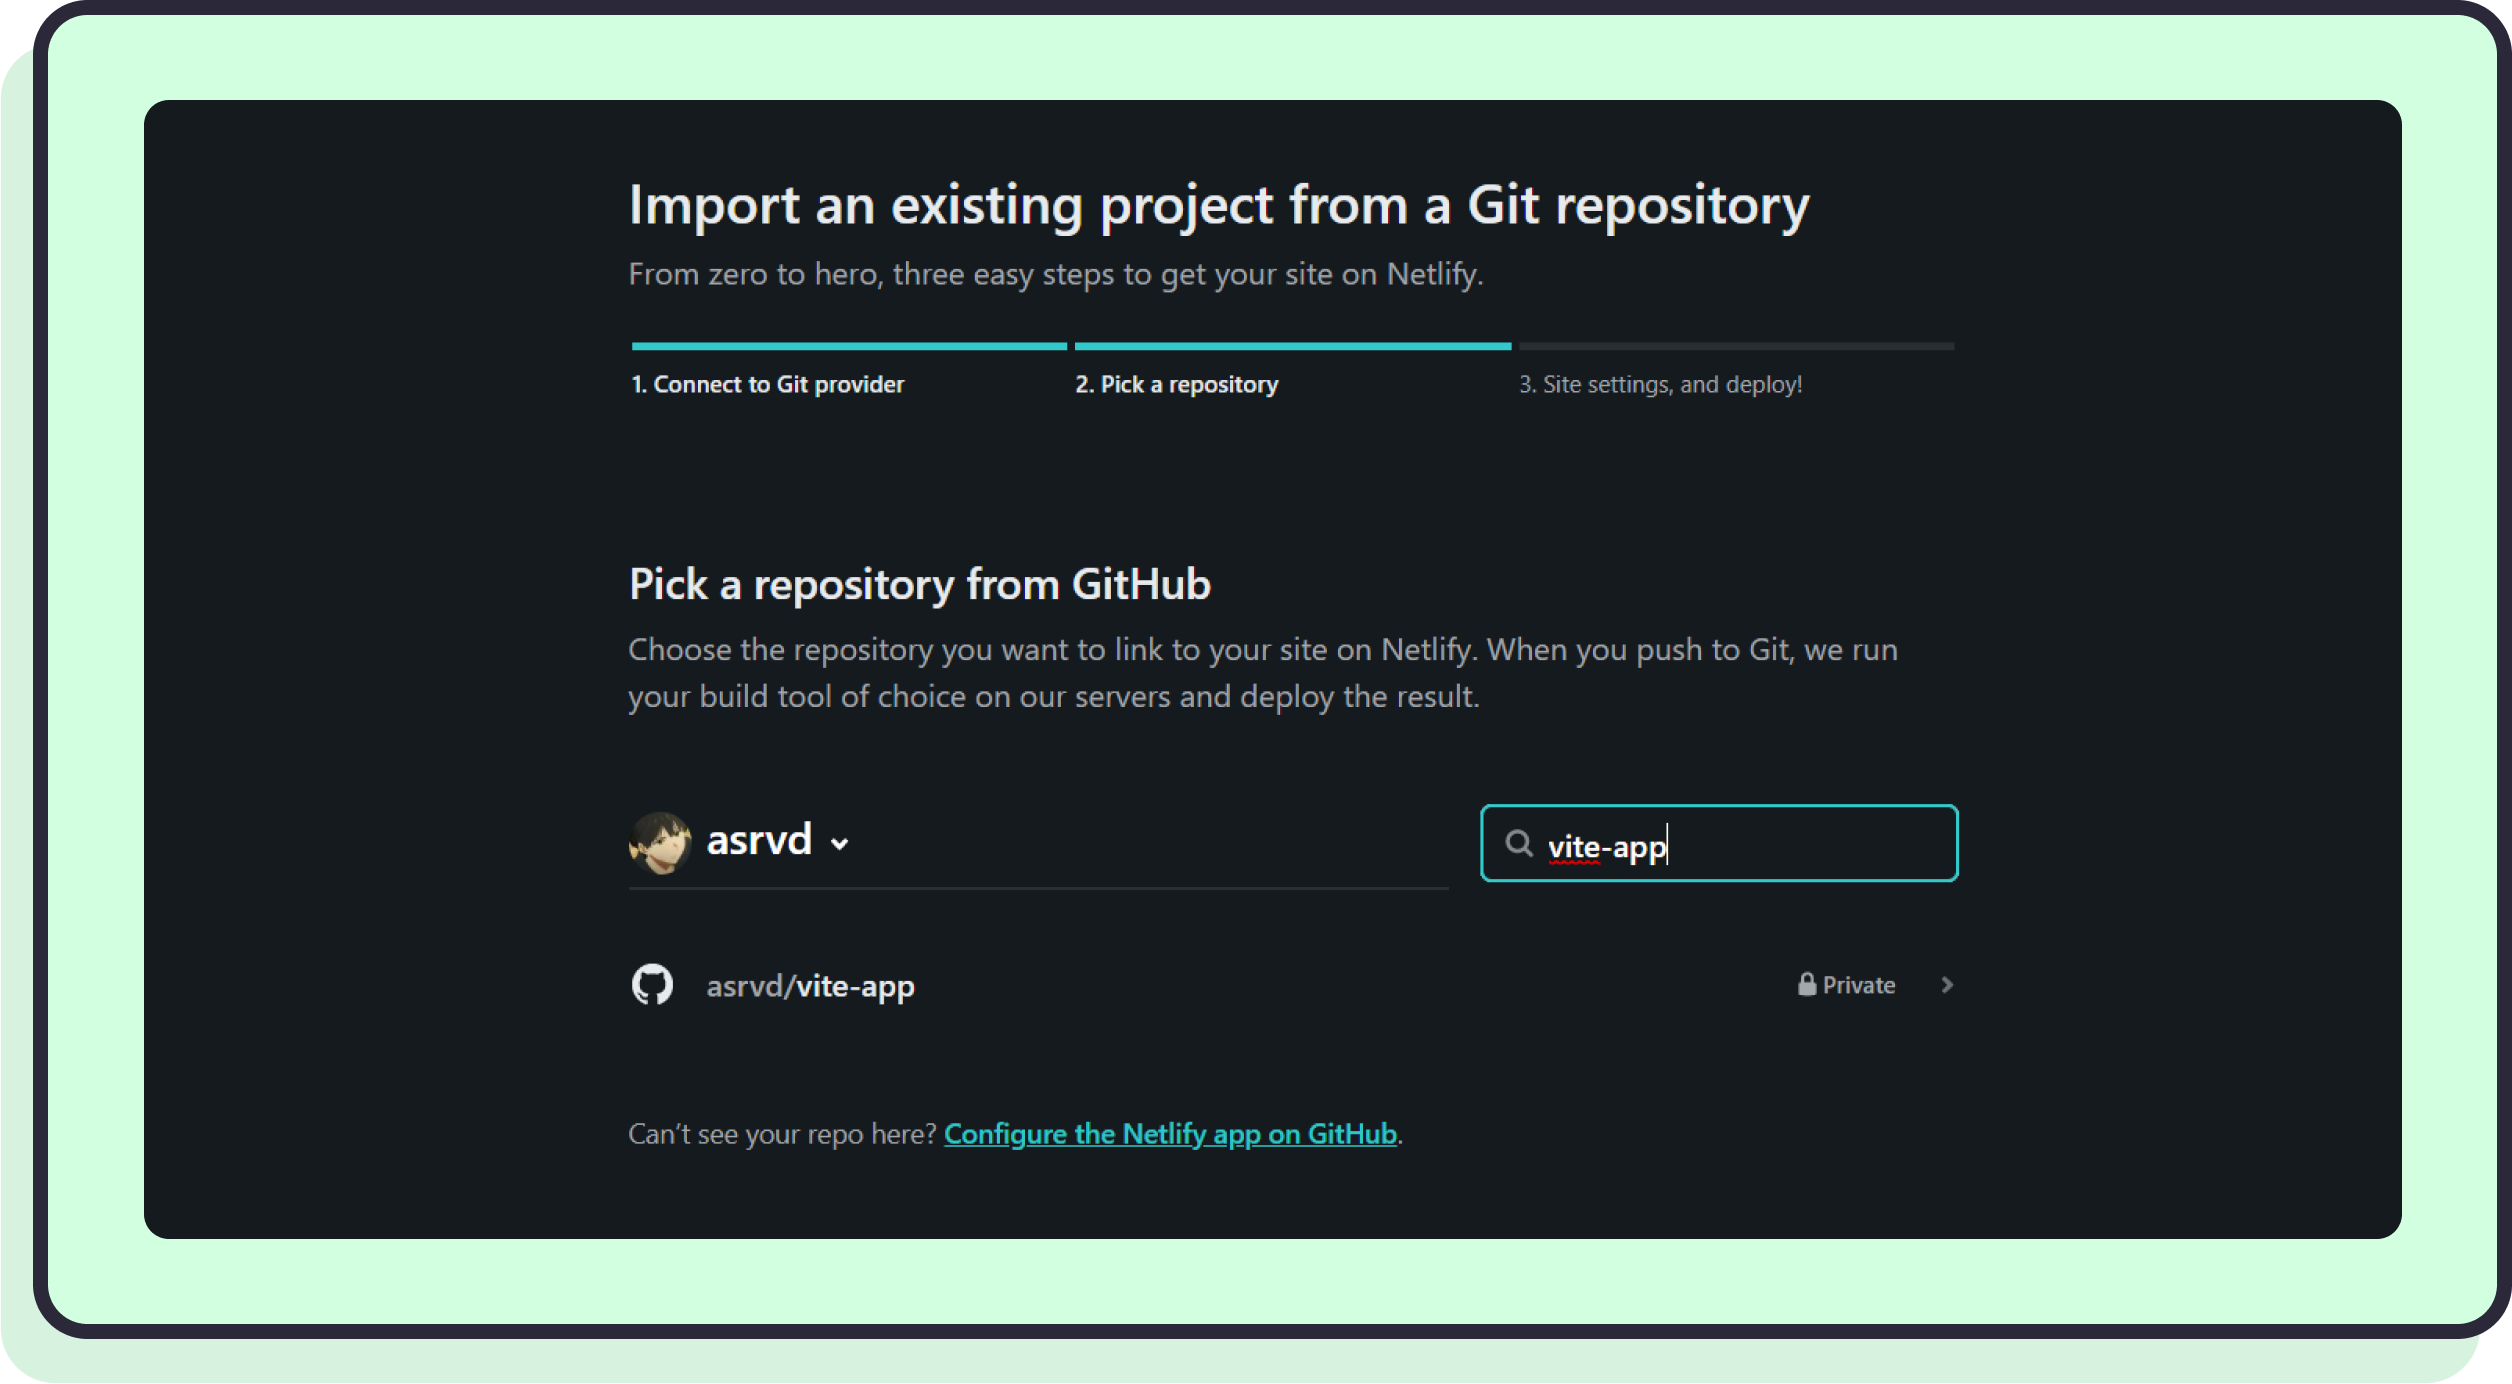
Deploy your app
Once you select your repository, you’ll be prompted to set some settings. Vite knows what Netlify wants to see and make your life easy by adhering tot he defaults. That means you don’t have to change anything here. Just hit Deploy site:
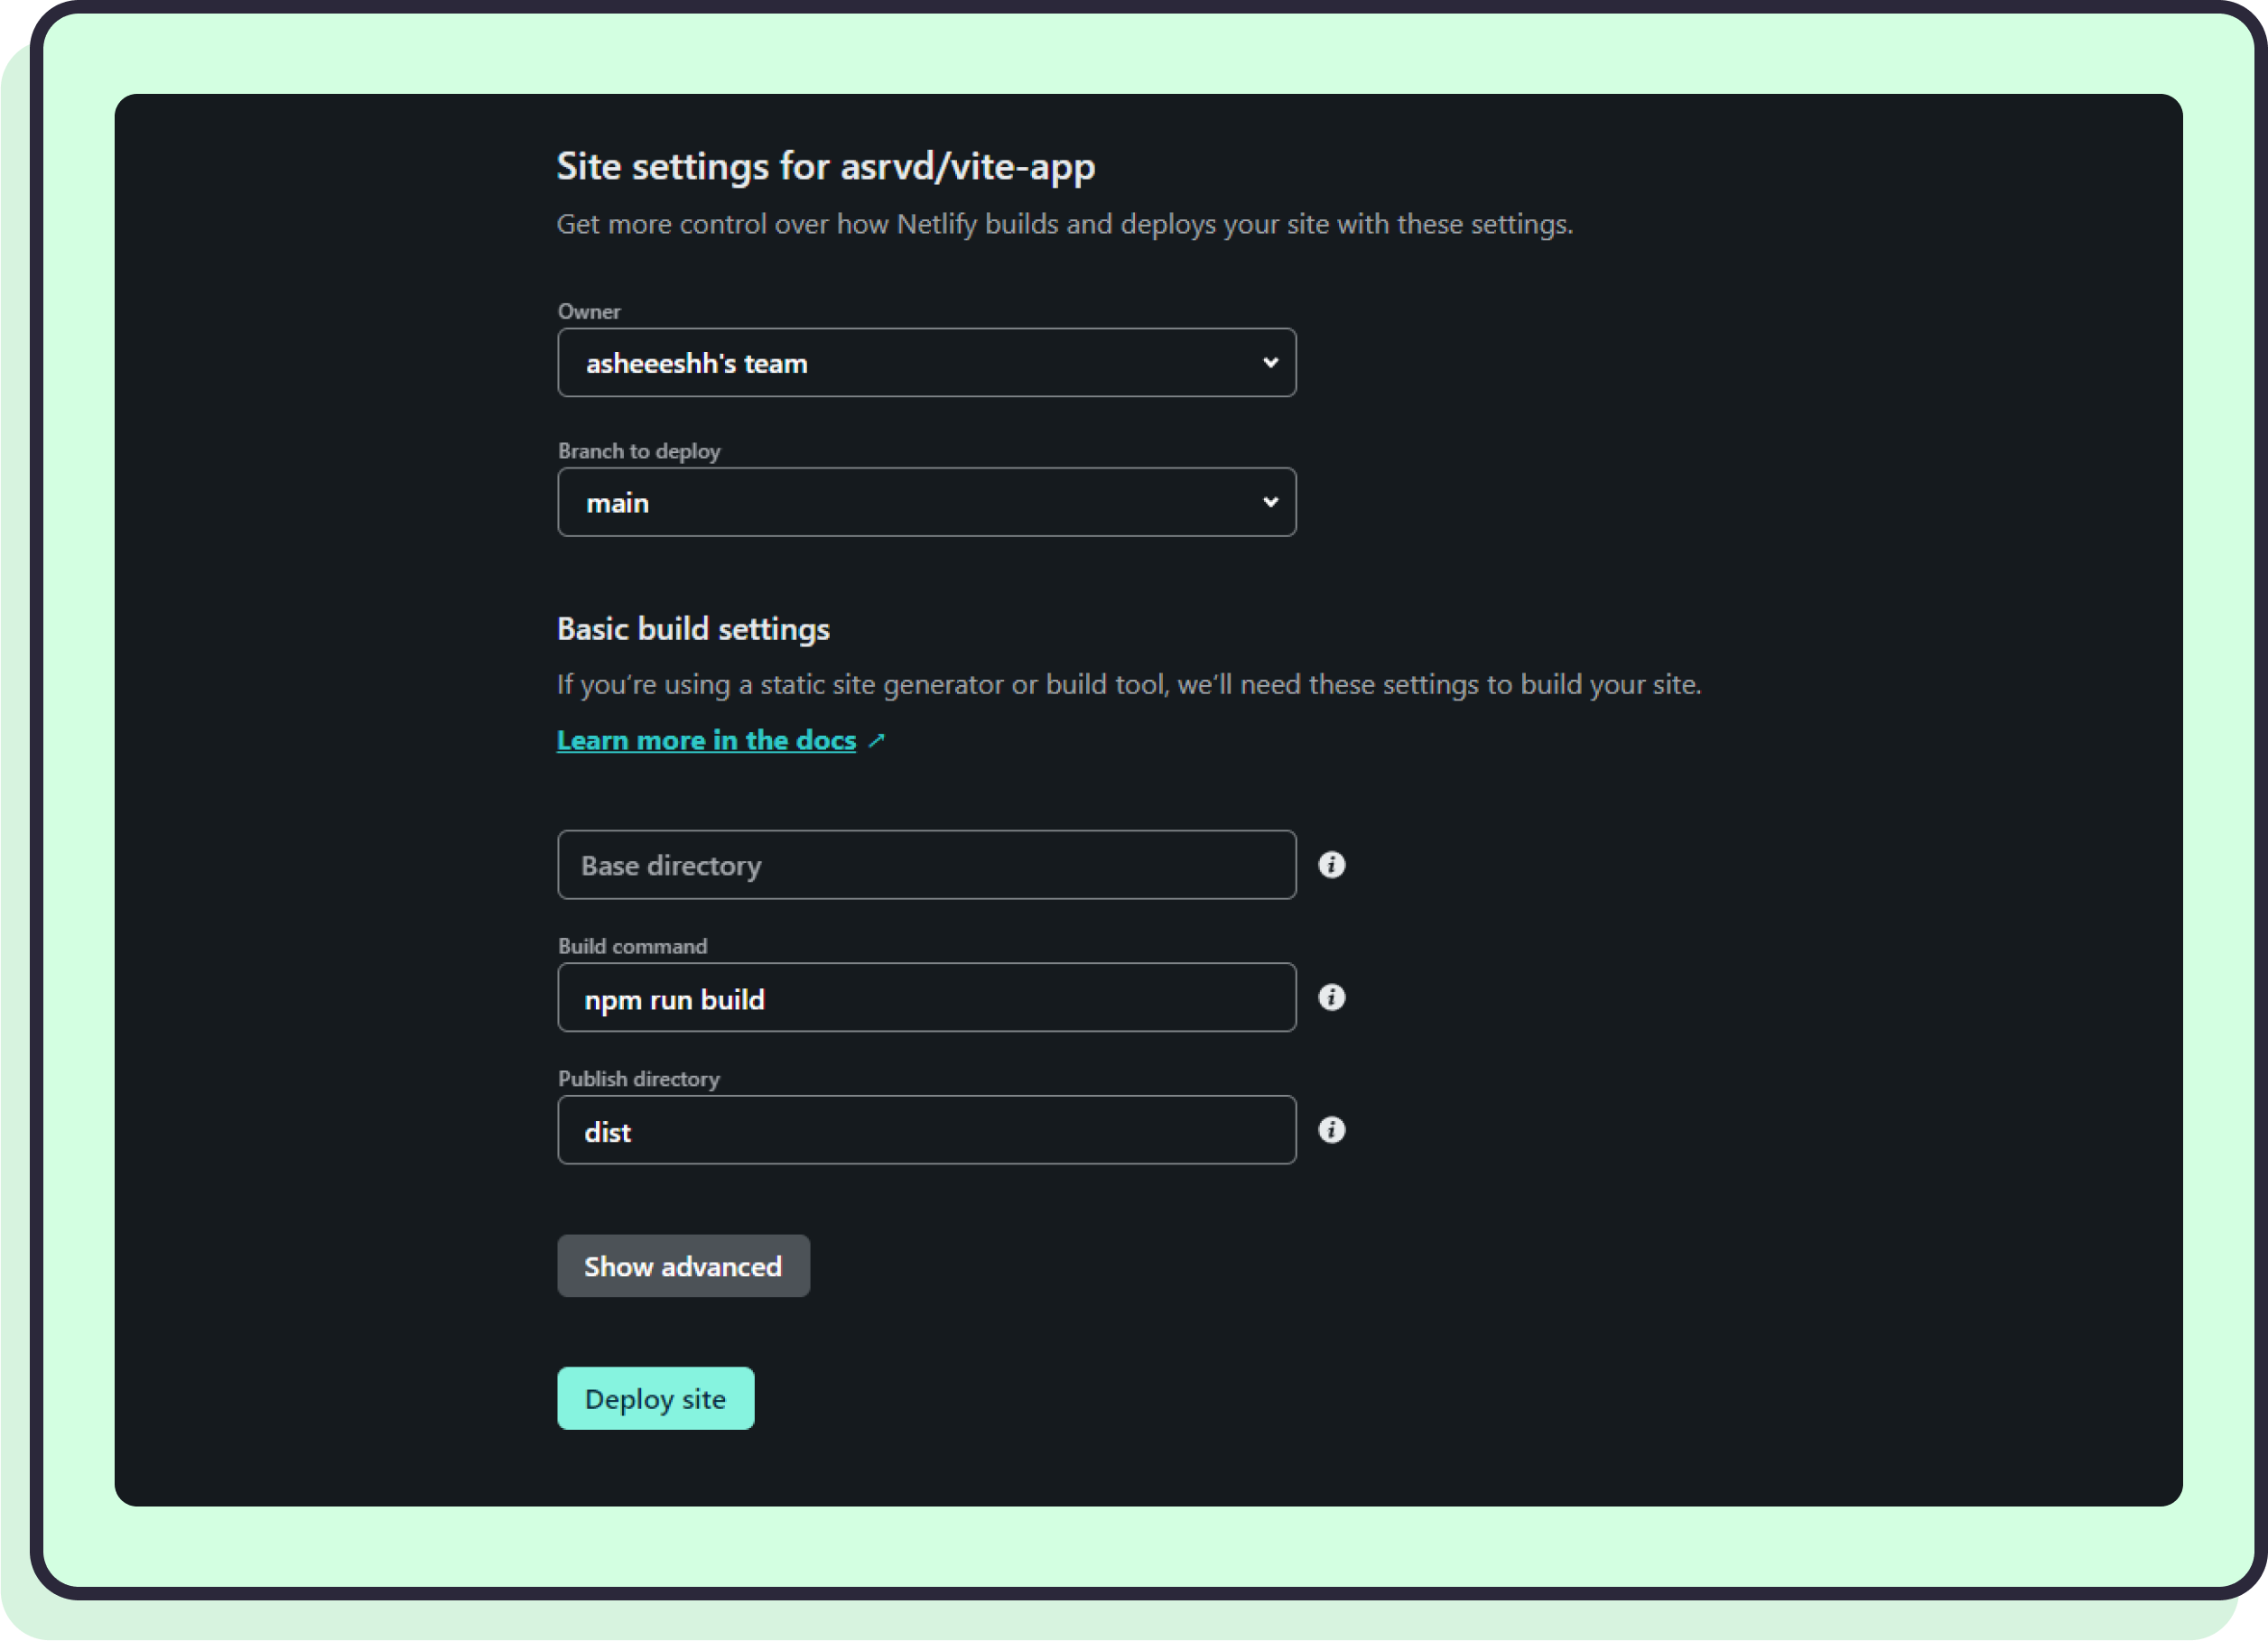
Once deployed, you should see this page and the link to your website:
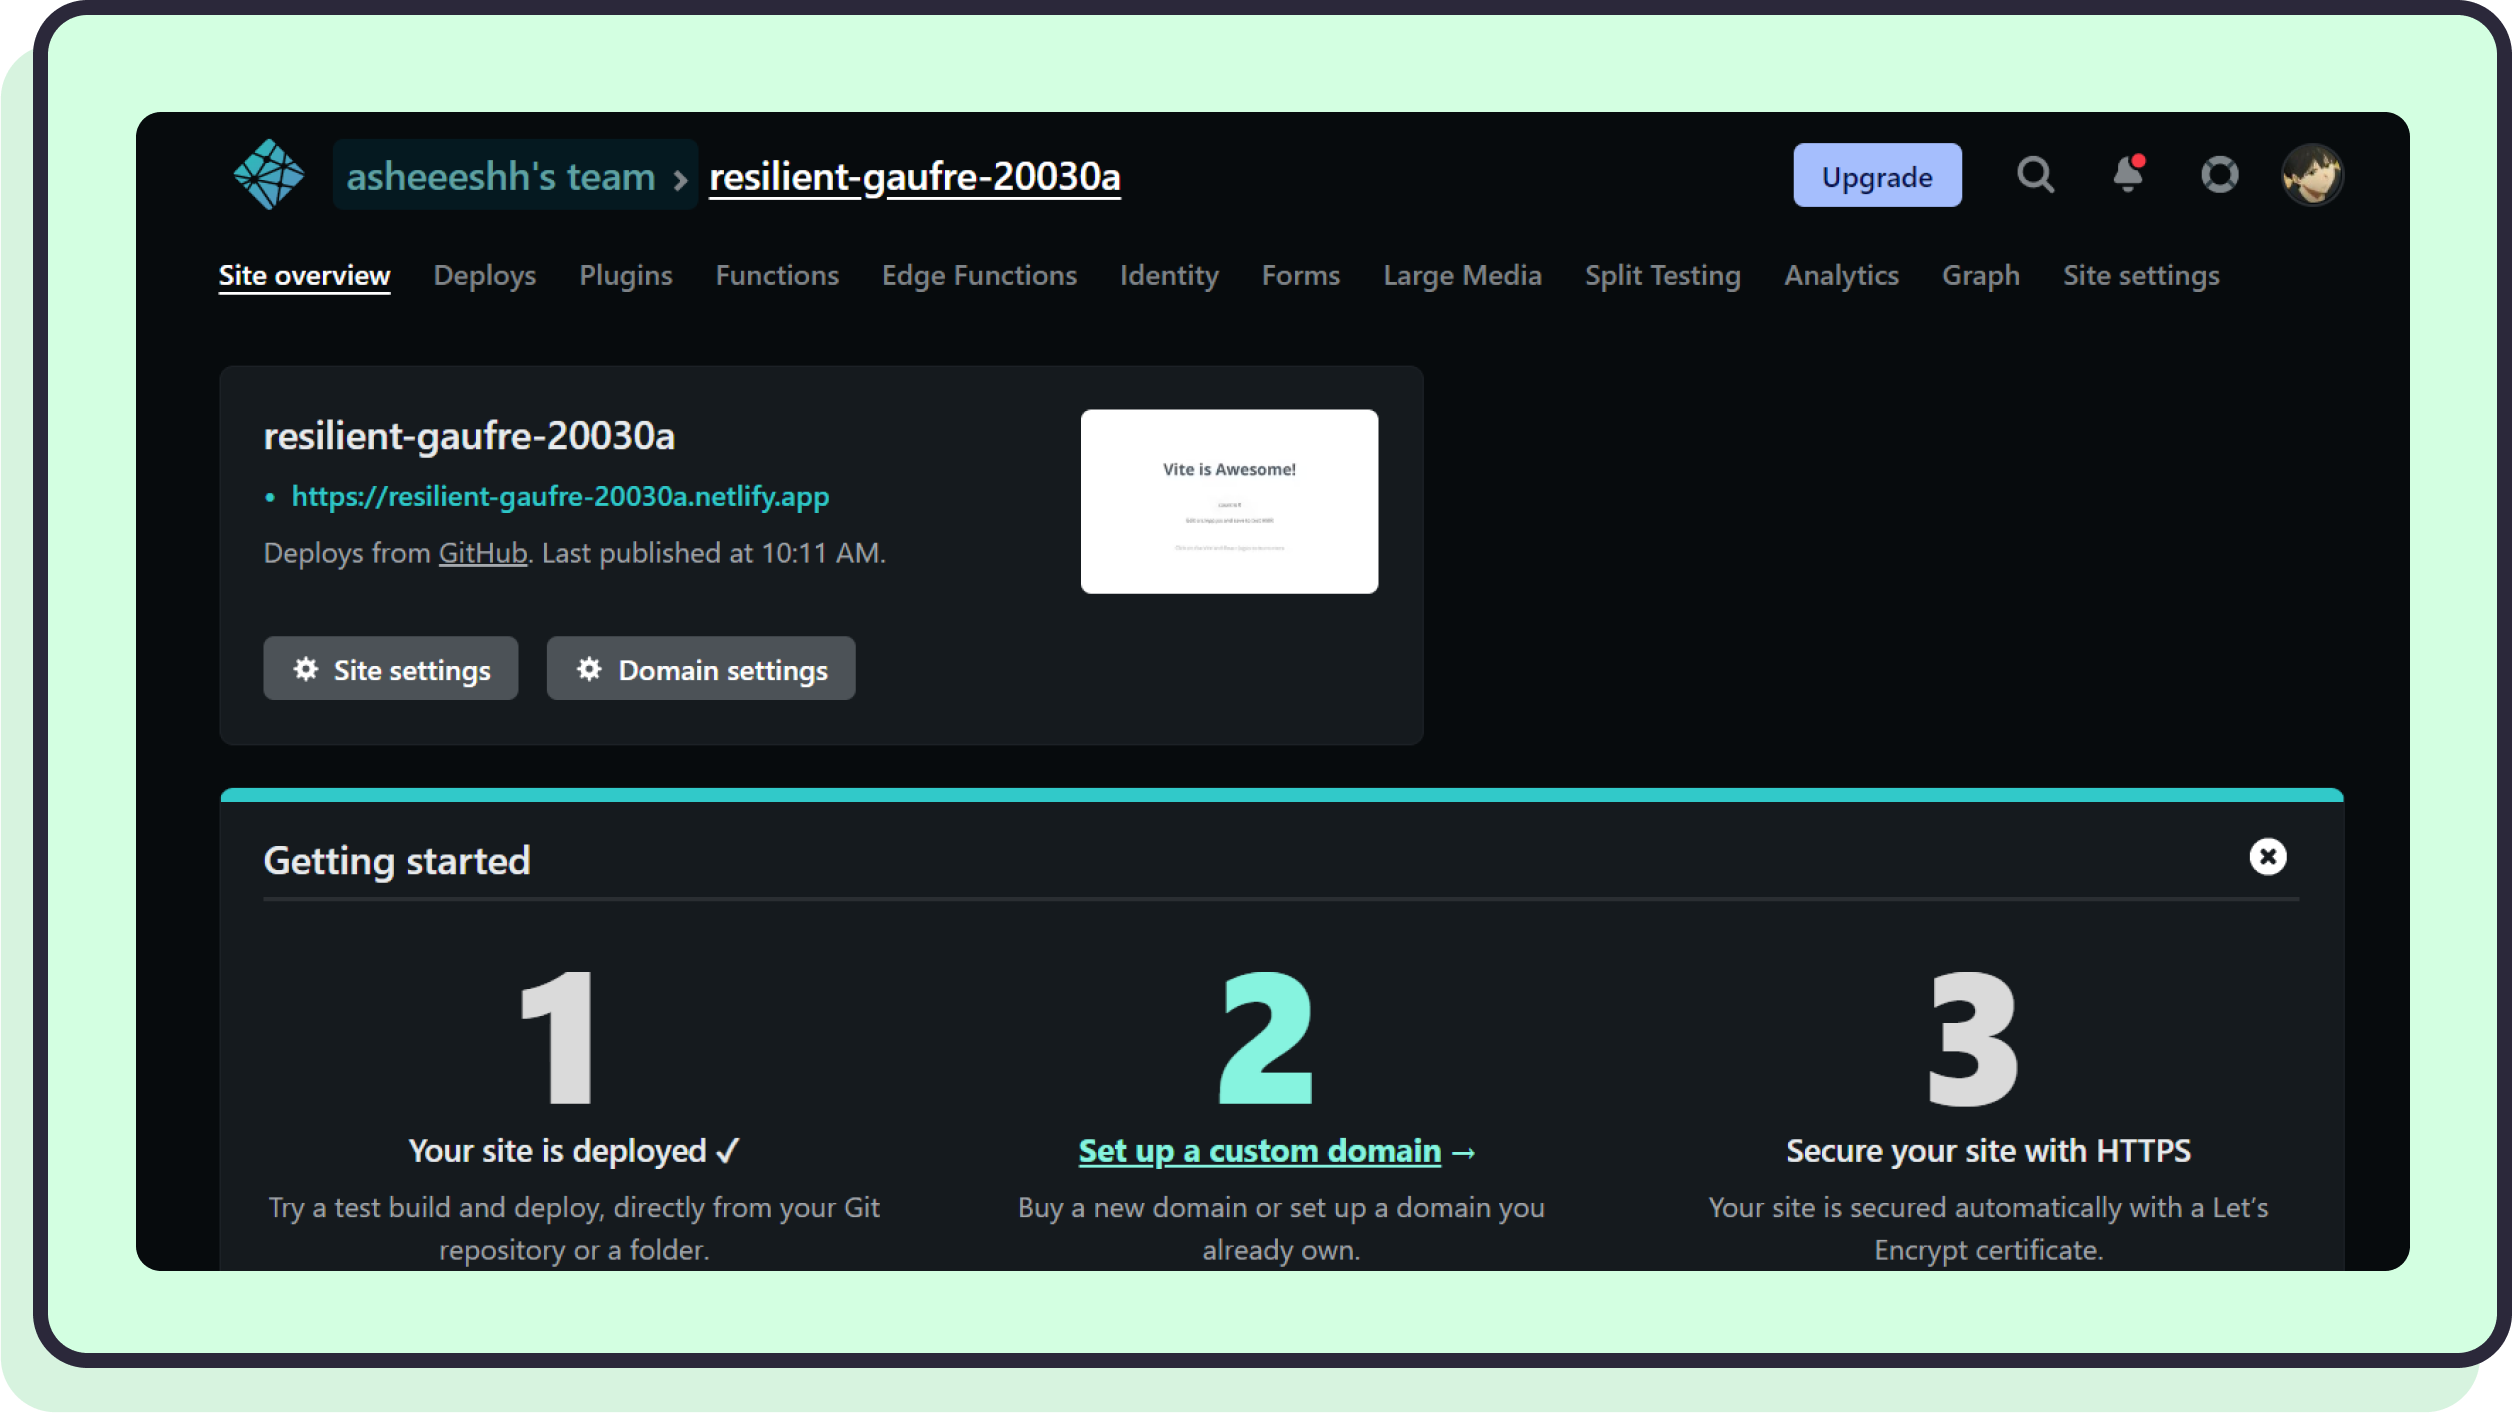
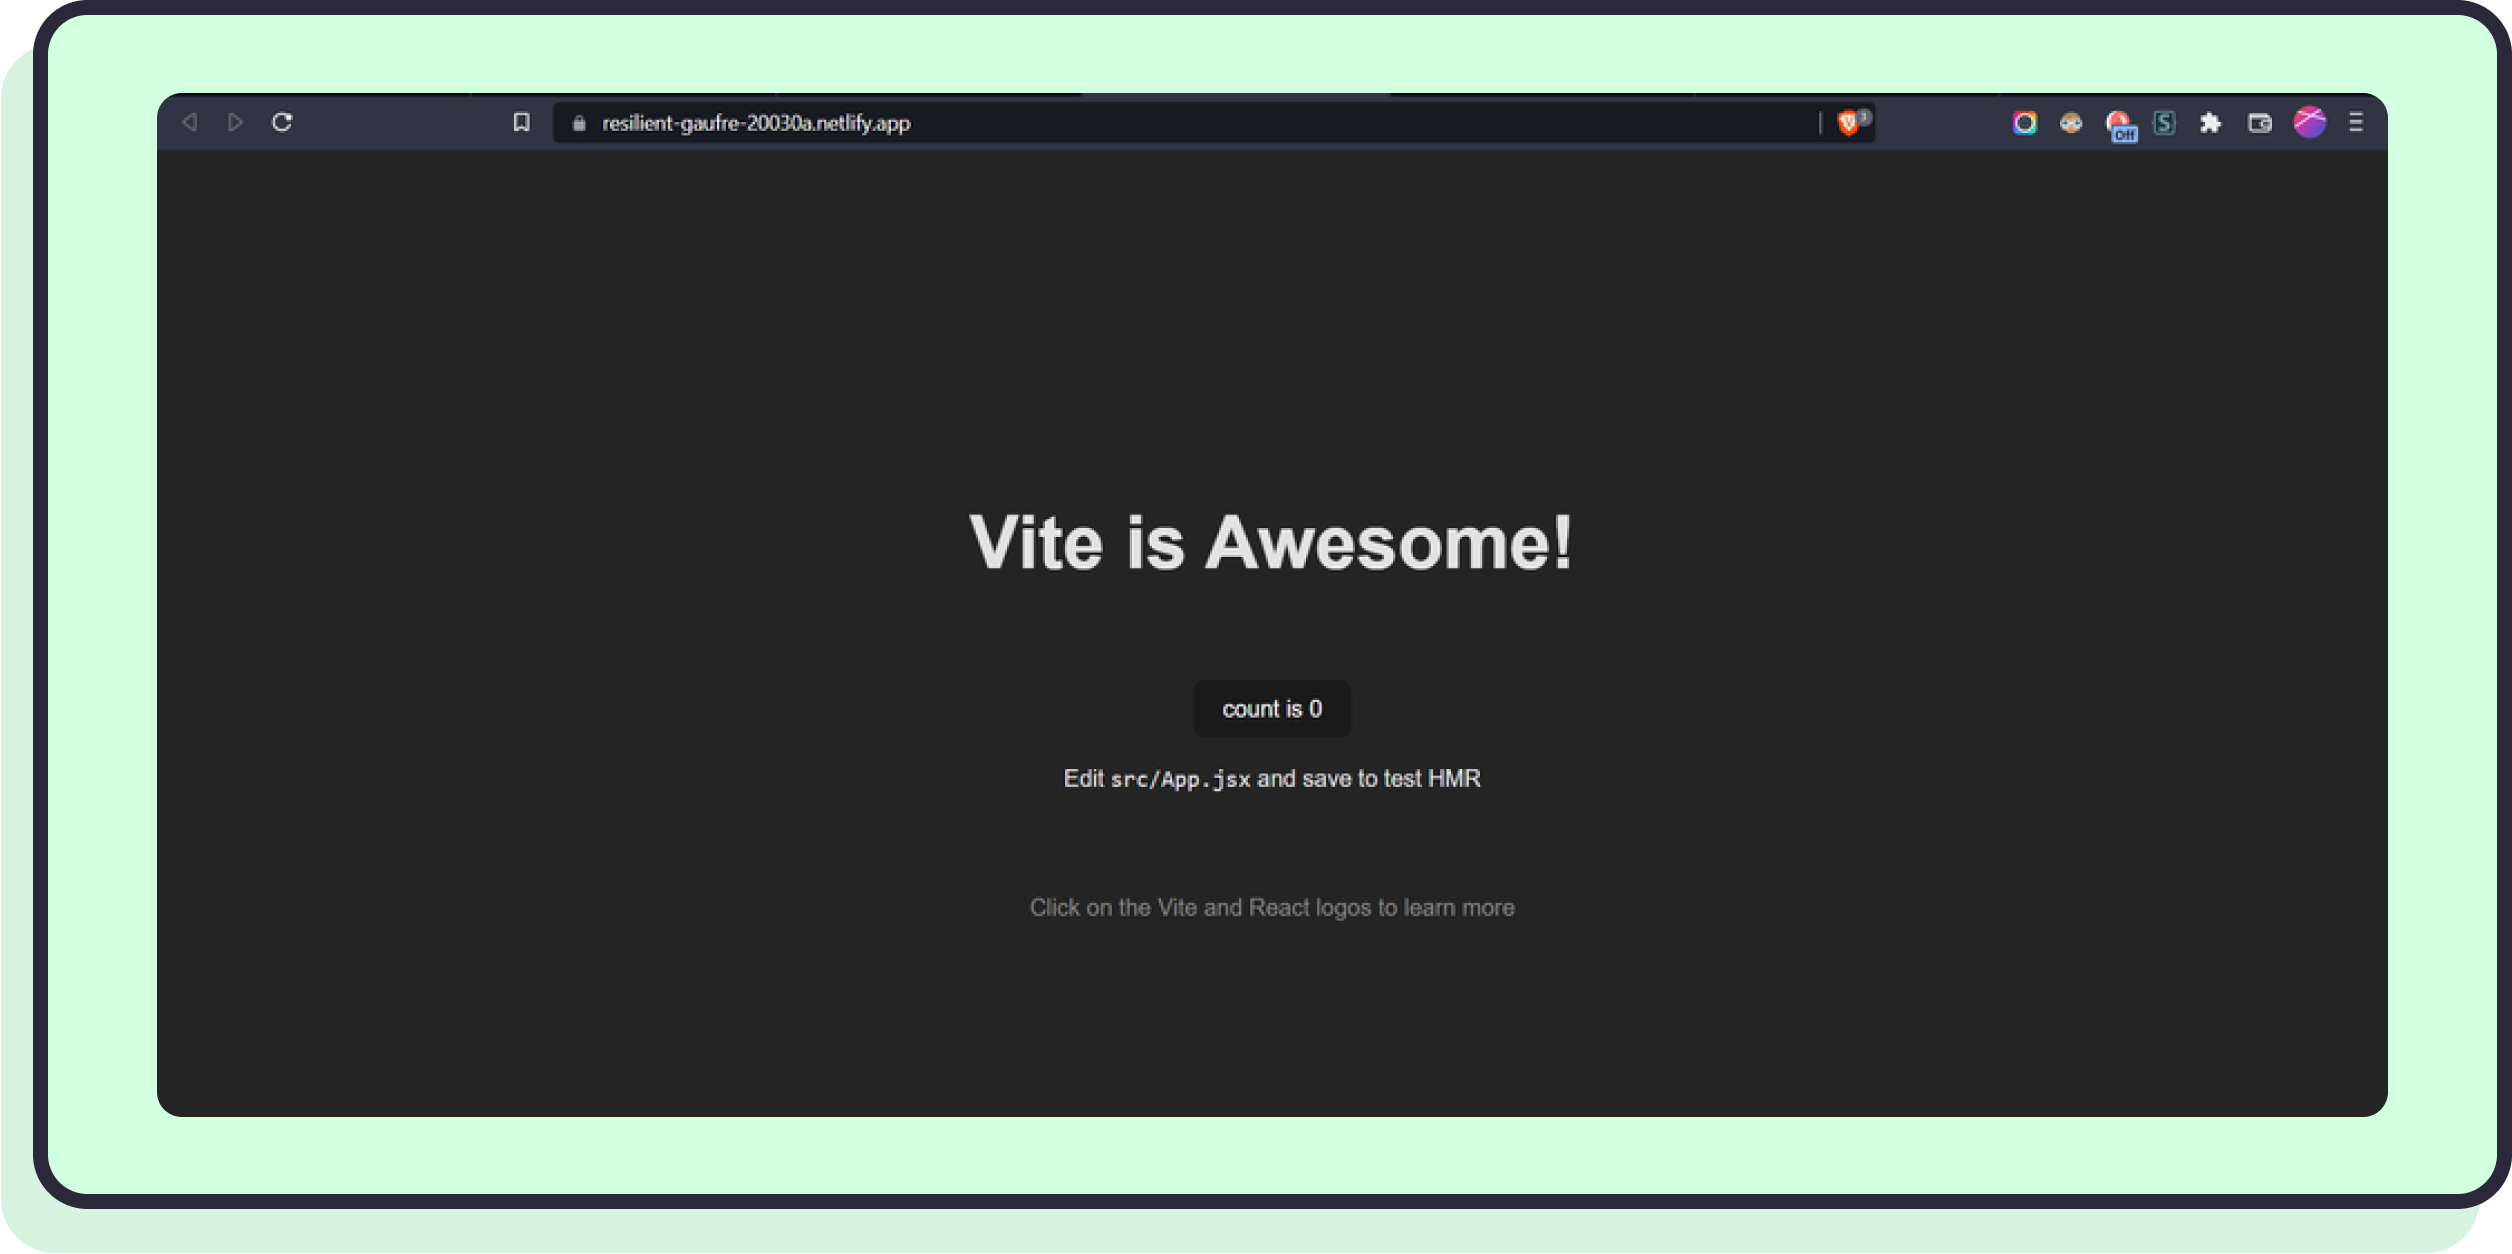
In our case, the link is resilient-gaufre-20030a.netlify.app:
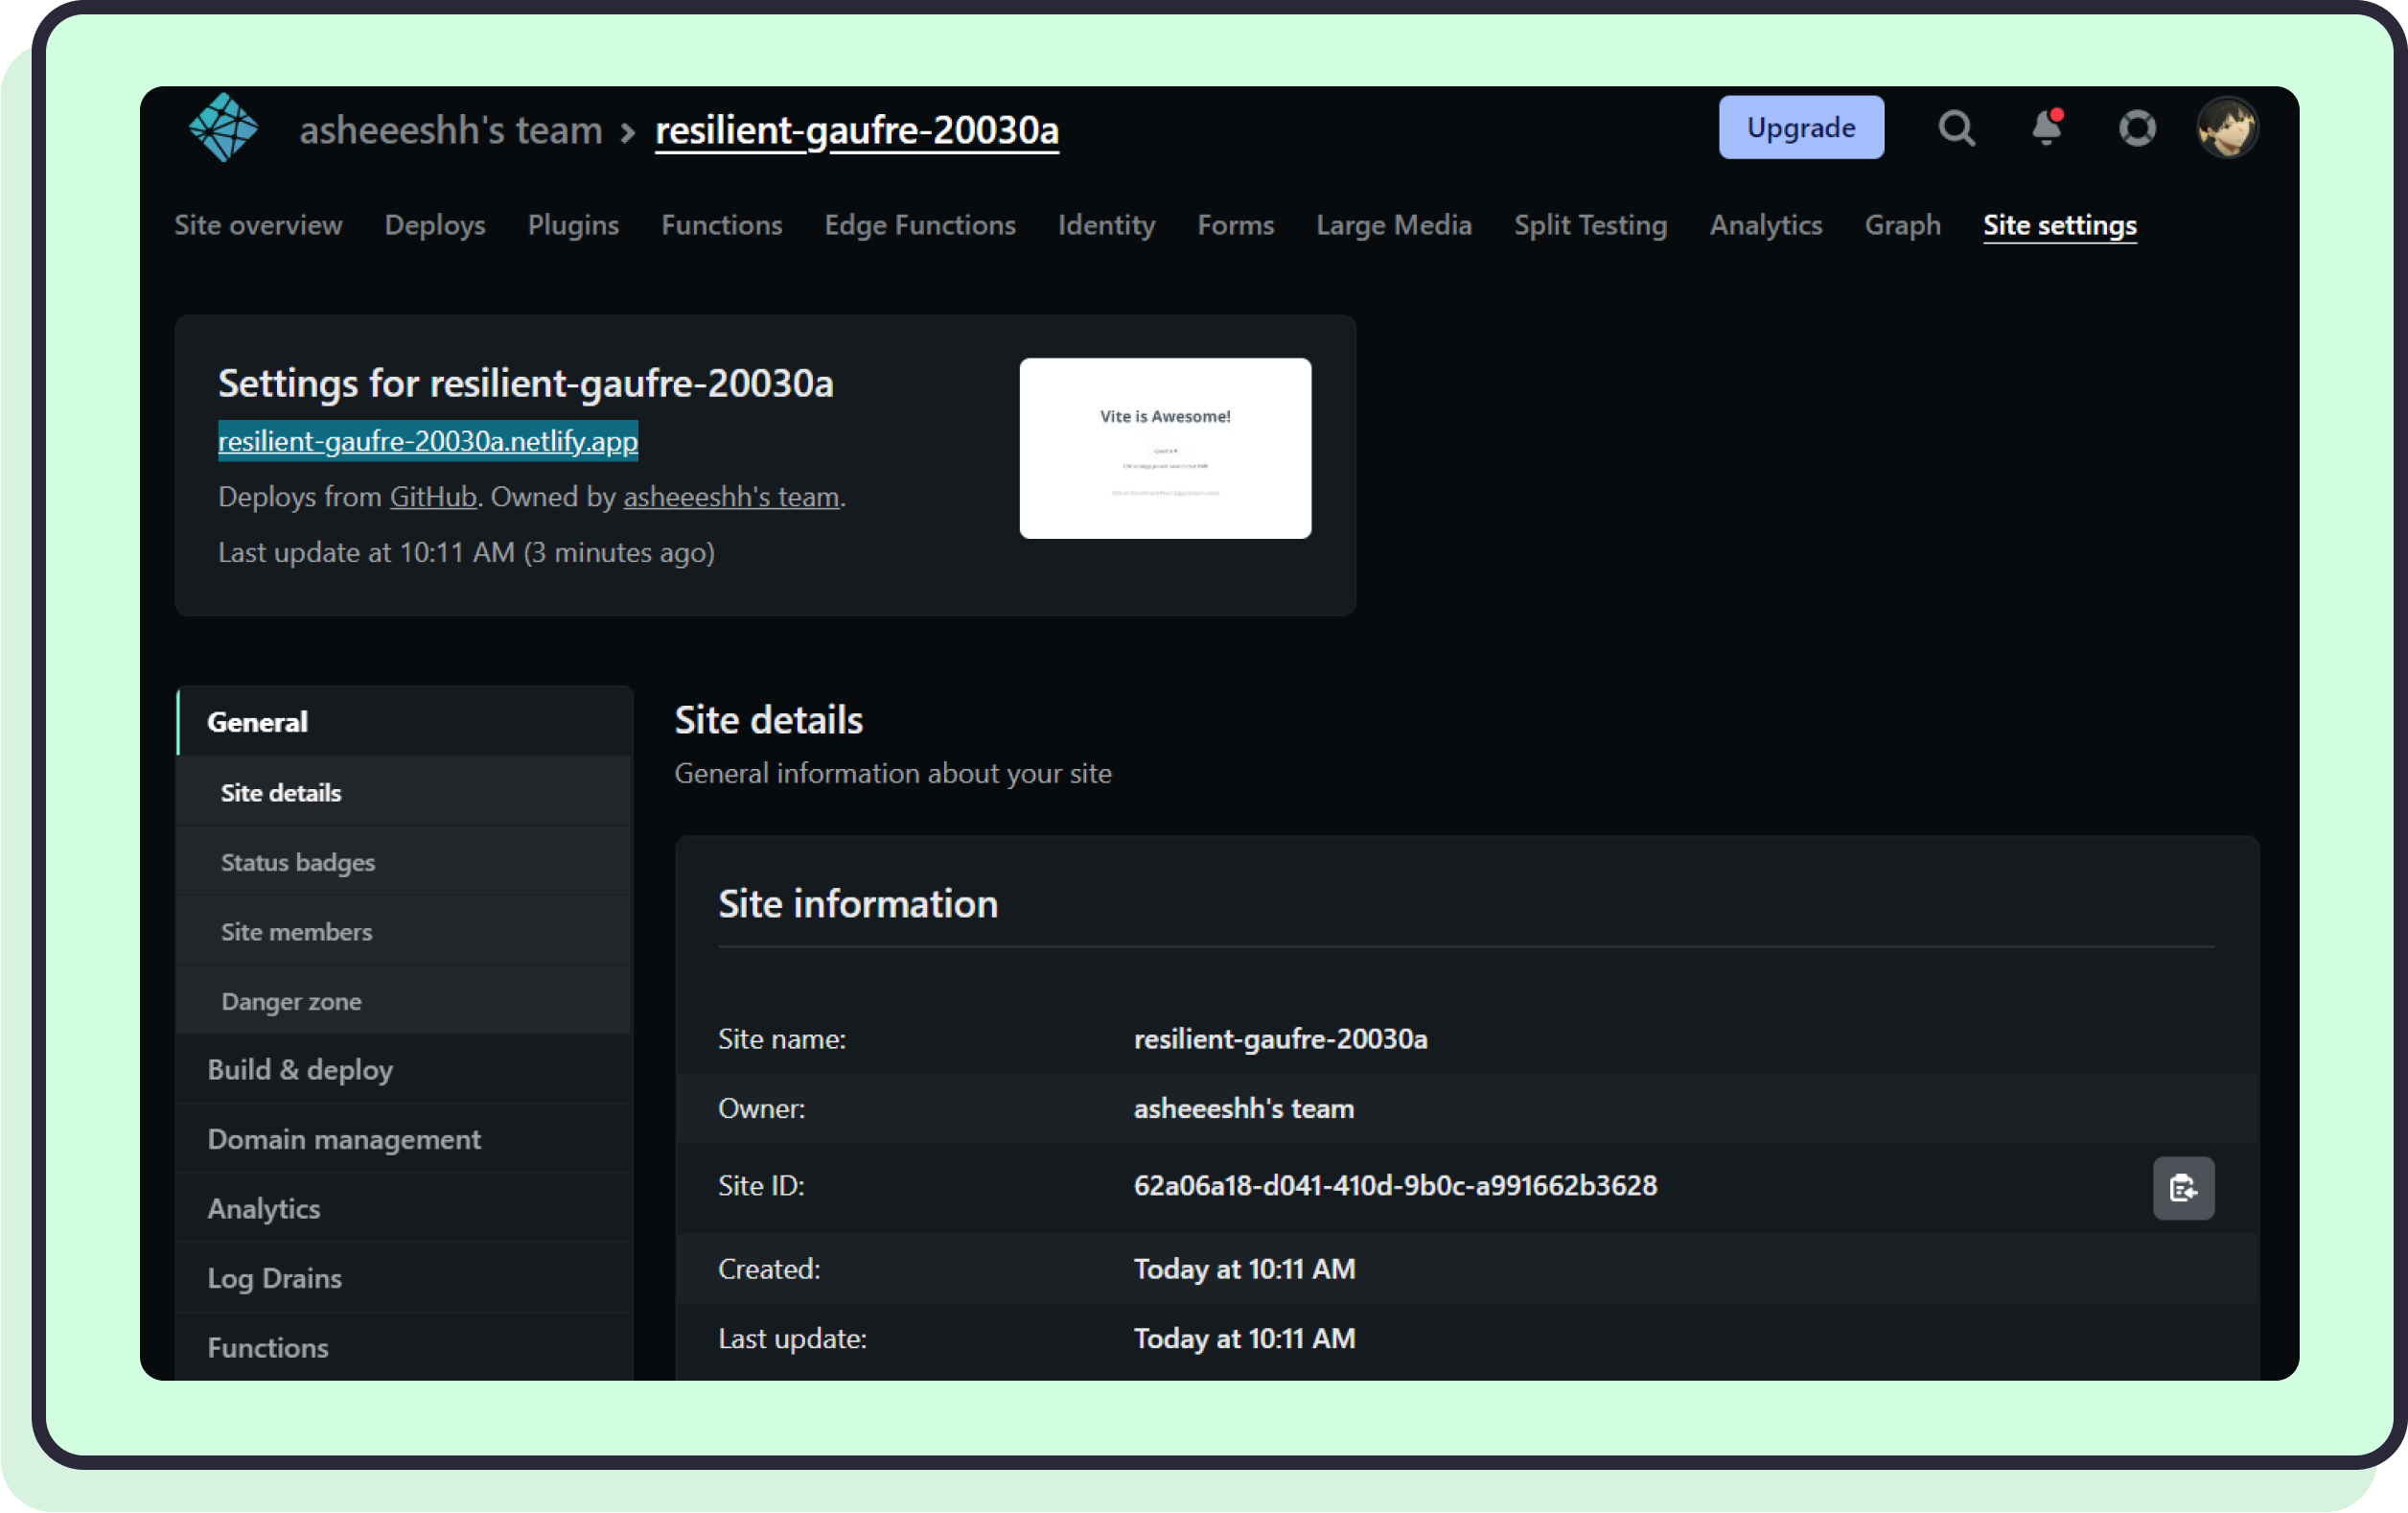
When you next have some free time, poke around the Site Settings.
Here, you can change everything related to your site and even assign a custom domain name!
As you make changes to your code and push them to GitHub, Netlify should detect this and update the live site!
For more in-depth tutorials on deploying a Vite app to other hosting providers, you can visit Vite’s deploying a Site section in its docs.
Advanced Vite
Vite is built on the shoulders of giants - namely, Rollup and EsBuild:
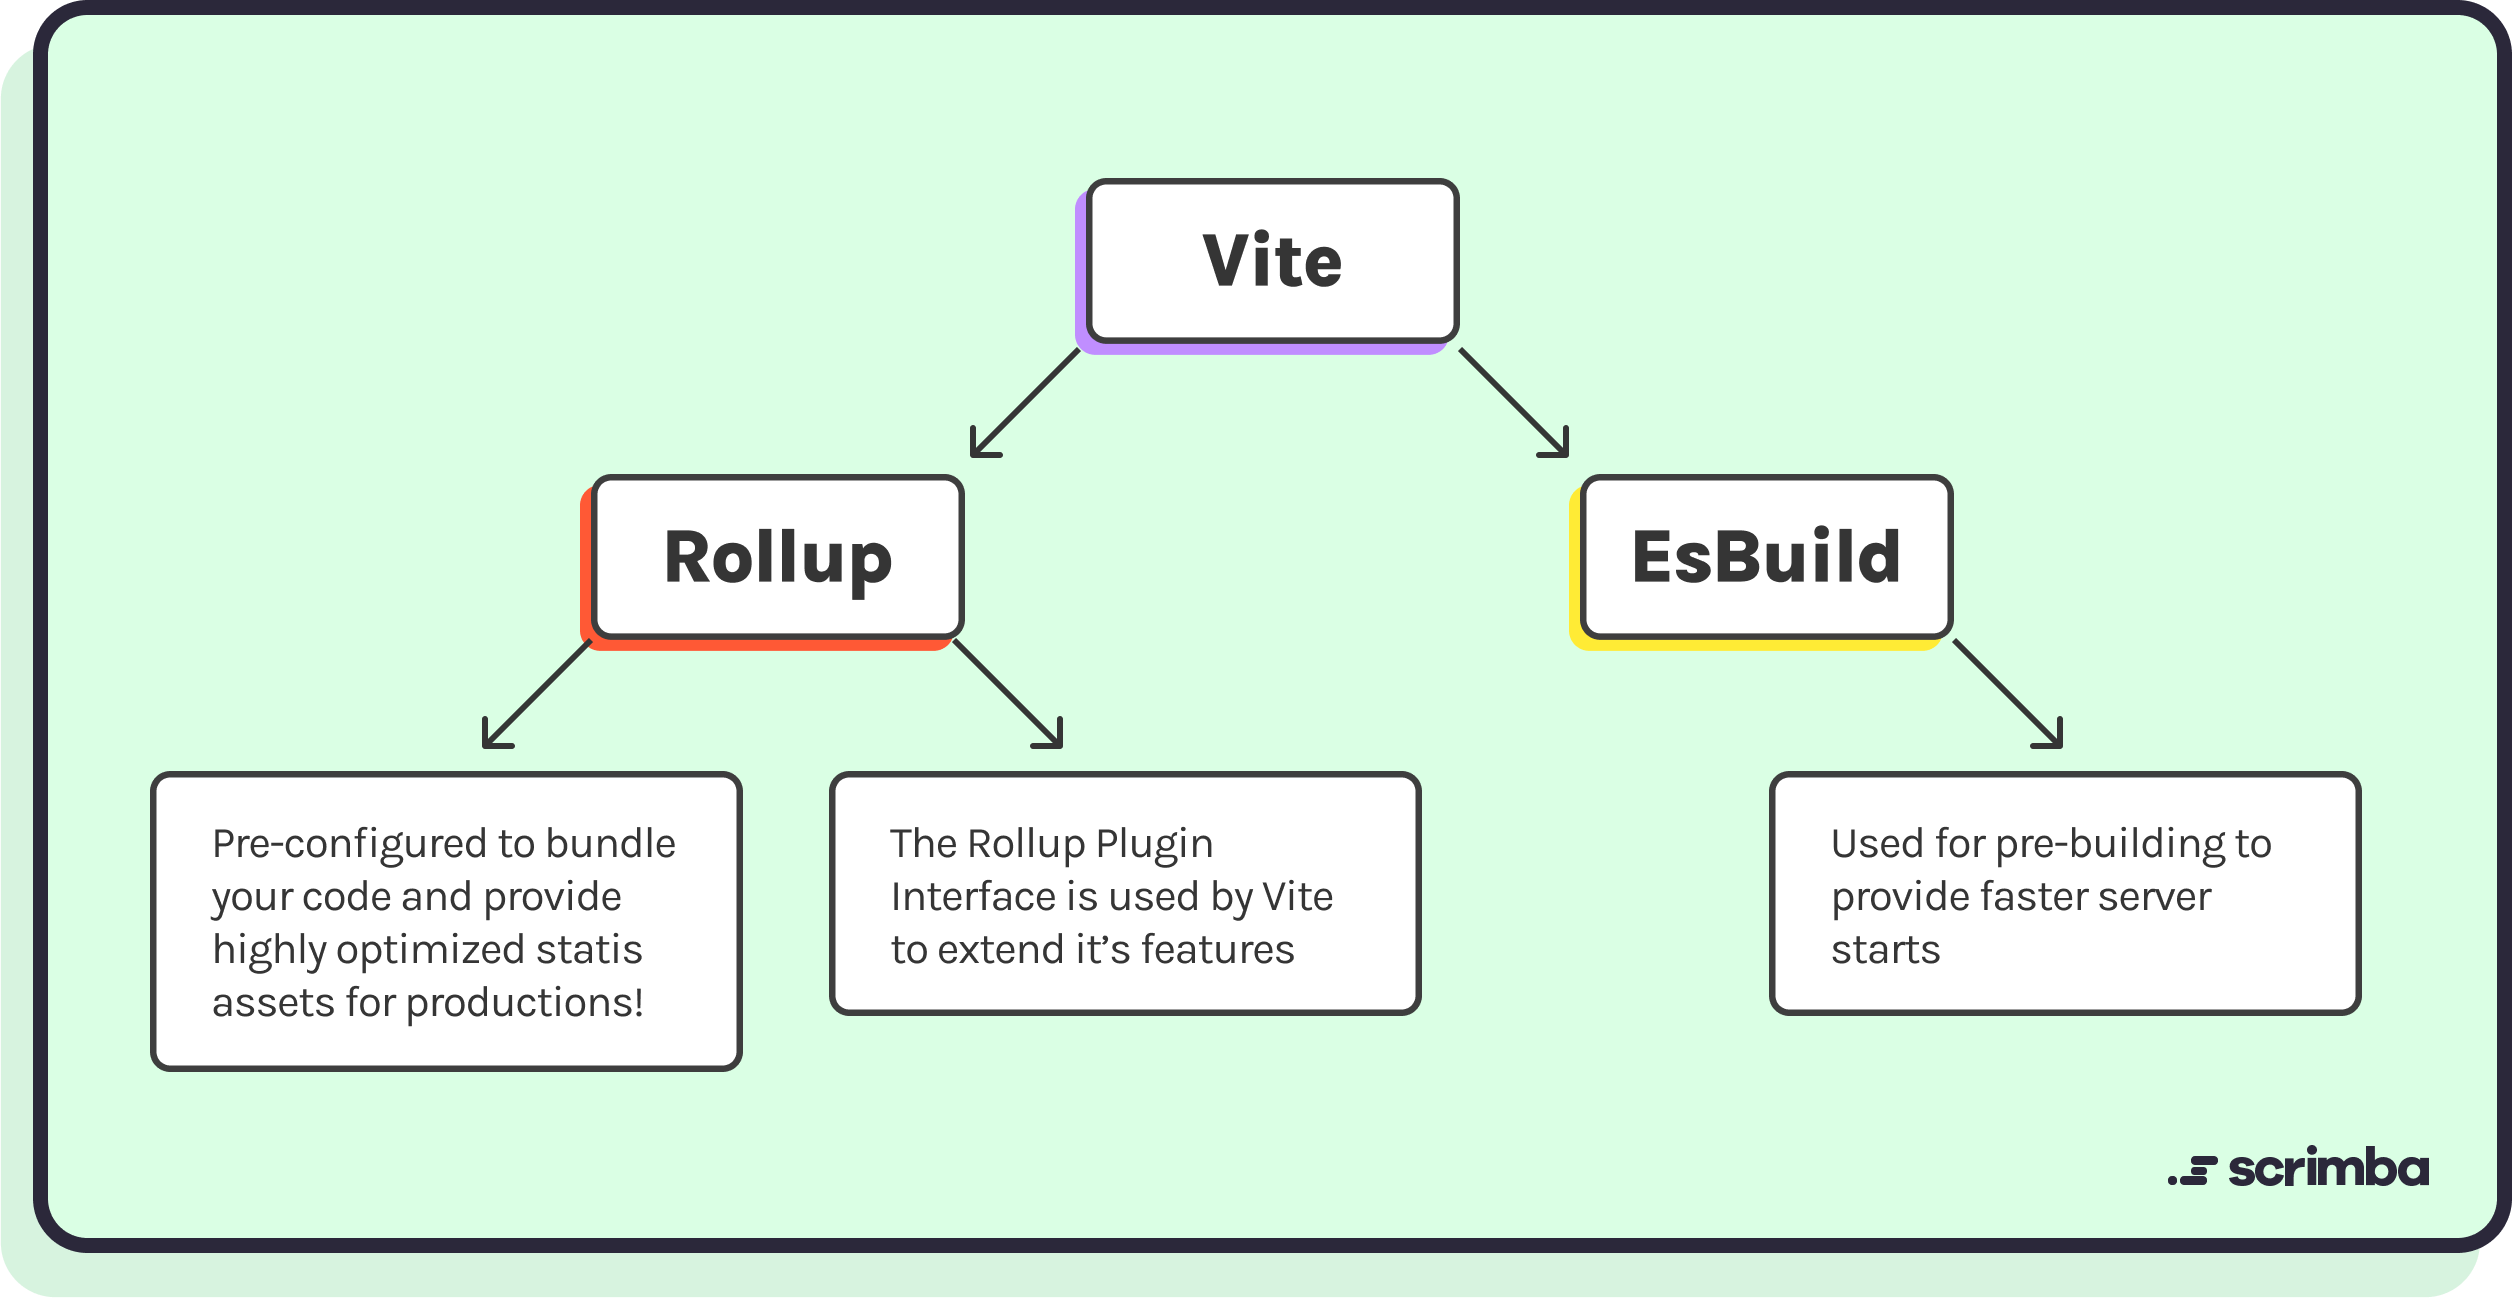
Understanding how Vite works under the hood at the high level lends way to some advanced features you can take advantage of.
Plugins
Vite can be extended using plugins based on Rollup's well-designed plugin interface with a few extra Vite-specific options.
This means that Vite users can rely on the mature ecosystem of Rollup plugins, while extending the dev server and SSR functionality as needed.
In short, plugins let you do more with your site app by providing integrations with other tools and adding additional features on top of Vite to make development easier.
Vite has a very in-depth guide about plugins in its docs. You can read it to get started with plugins.
Env Variables
Env Variables are the variables set outside the code itself but are very important for the code to run and can't be leaked along with your code base.
They can be a token from an API you are using, Auth token, Database passwords, or anything that you wouldn’t want anyone else looking at your code to discover. To set env variables, you create a .env file in the root of your application and then add your variables in the format TOKEN=secret_token, In most JavaScript applications you can access your env variables in code using the process.env object.
Vite uses the object import.meta.env to expose your env variables, by default the env variables are not exposed to the frontend to prevent token leaking. To expose your variables to your code, you can prefix the variable name with VITE_.
# This will not be exposed to the frontend
SECRET_TOKEN=i_should_not_be_exposed_to_the_client

# This will be exposed to the frontend
VITE_NORMAL_TOKEN=i_can_be_exposed_to_the_client
Now, to use these tokens in your code:
console.log(import.meta.env.SECRET_TOKEN)
console.log(import.meta.env.VITE_NORMAL_TOKEN)
There are some more concepts that you may need to know if you need more functionalities in your project like backend integration and server-side rendering but they are out of scope for this article.
The Verdict
According to npm, Vite is downloaded 1.4 million times a week, and that number is only going up! Perhaps now you’ve read this post, you can understand why!
In this post, we explored the fundamentals of Vite and how it compares to Create React App.
You got to experience first-hand how, when you start your project with Vite, it becomes somewhat straightforward to enable other productivity-boosting features like HMR, or even deploy your website to Netlify, for example.
Vite is easy because it hides a lot of the nitty-gritty details behind commands. Simultaneously, it’s still possible to drop down a level and take advantage of tried-and-true Rollup plugins. Looking back, it’s clear the Vite team observed developers in action to design and build a tool suitable for newer React developers and experts alike.
